Voice Menus allow you to direct calls coming into your organization based on a selection the caller makes on their keypad. Callers will hear a recorded greeting, presenting them with menu options which, when selected, will route their call to the corresponding destination.
Administrators have full access to the voice menus for your organization using the Account Center. Locate Voice Menus in the Phone System menu and expand the heading. Here you will see options to both Manage and Create voice menus.
The Manage Voice Menus page will allow you to view any voice menus that are currently set up for your organization.
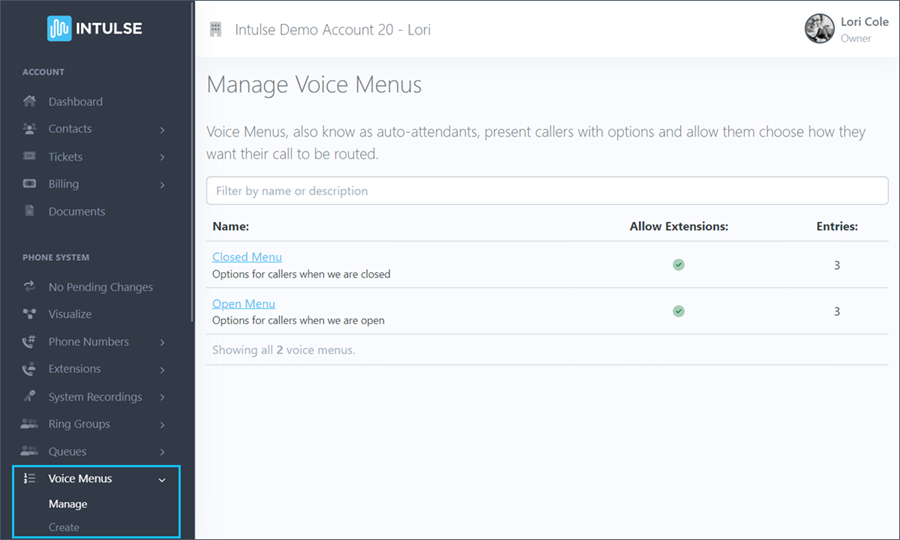
You can select any voice menu to make updates to your system. Simply click on the voice menu you would like to edit. This will open the editor and allow you to change your settings. There are 4 different setting tabs to be edited on this page.
For detailed explanations of each field, see the Create Voice Menus support page. All settings are thoroughly explained there.
Begin by determining the basic settings for the voice menu.
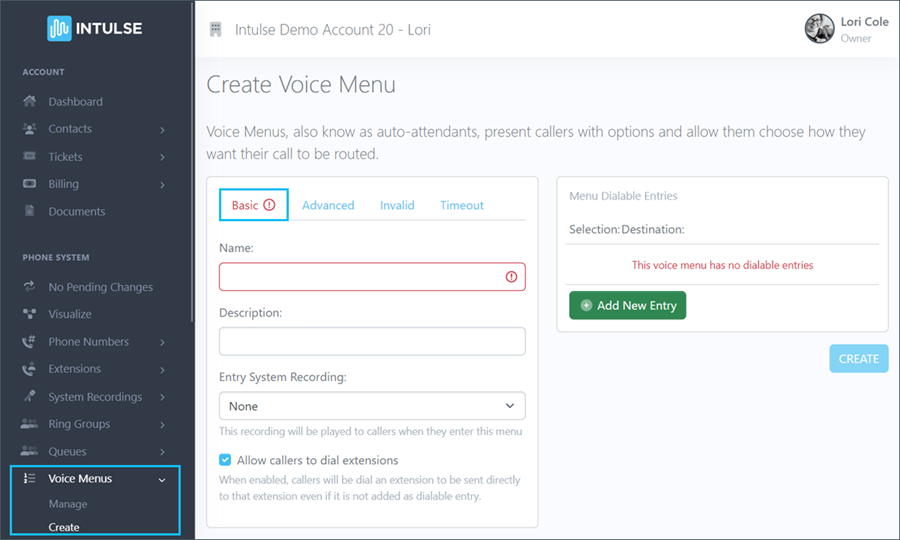
"Basic" Settings include:
Next, select the Advanced settings tab.
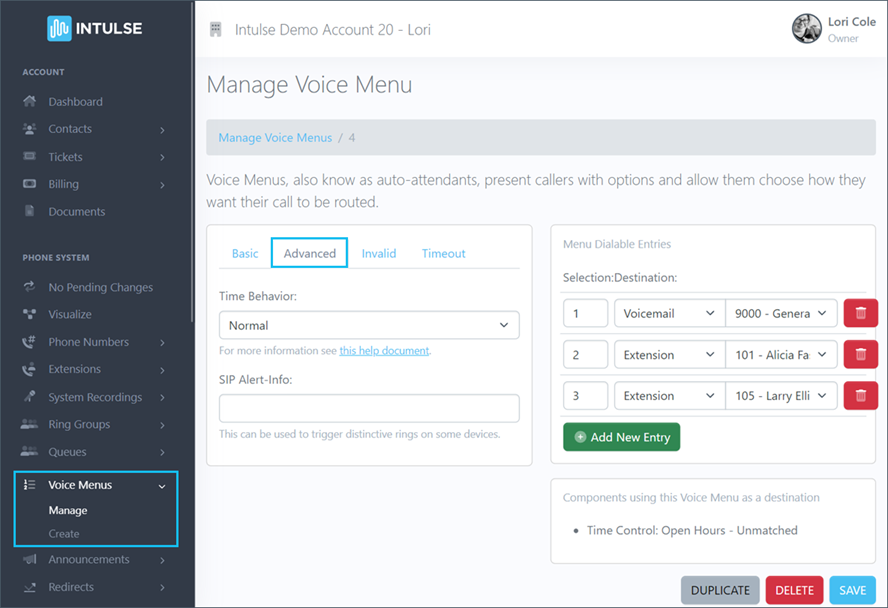
"Advanced" Settings include:
Next let's take a look at the settings for when a caller makes an Invalid selection.
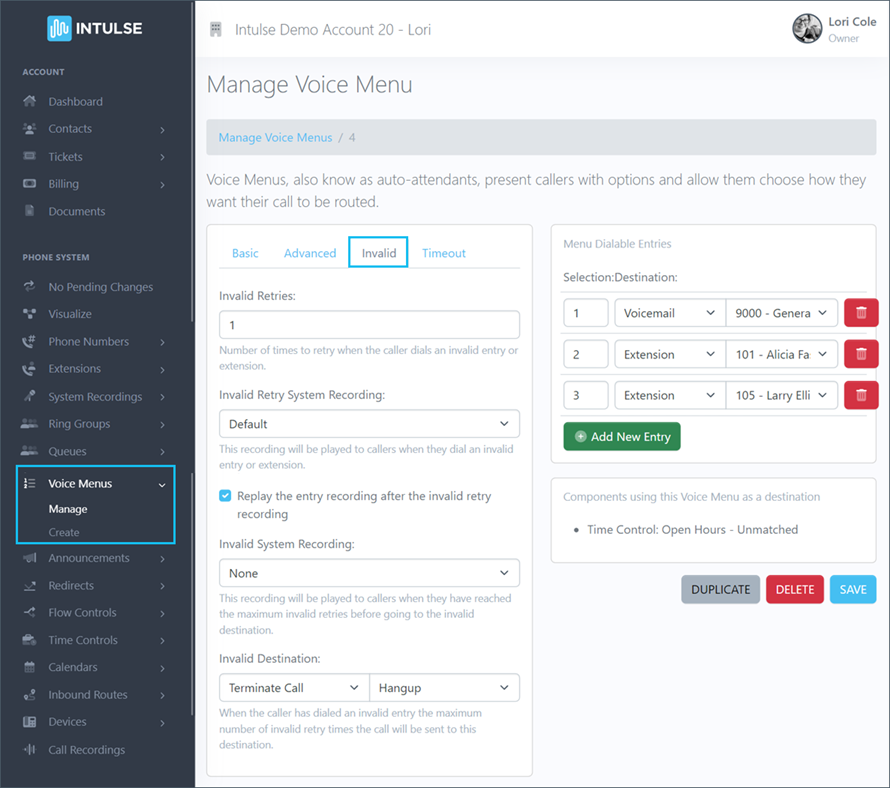
"Invalid" Settings include:
Now, click on the Timeout tab to determine settings for when a caller doesn't make a selection in a reasonable amount of time.
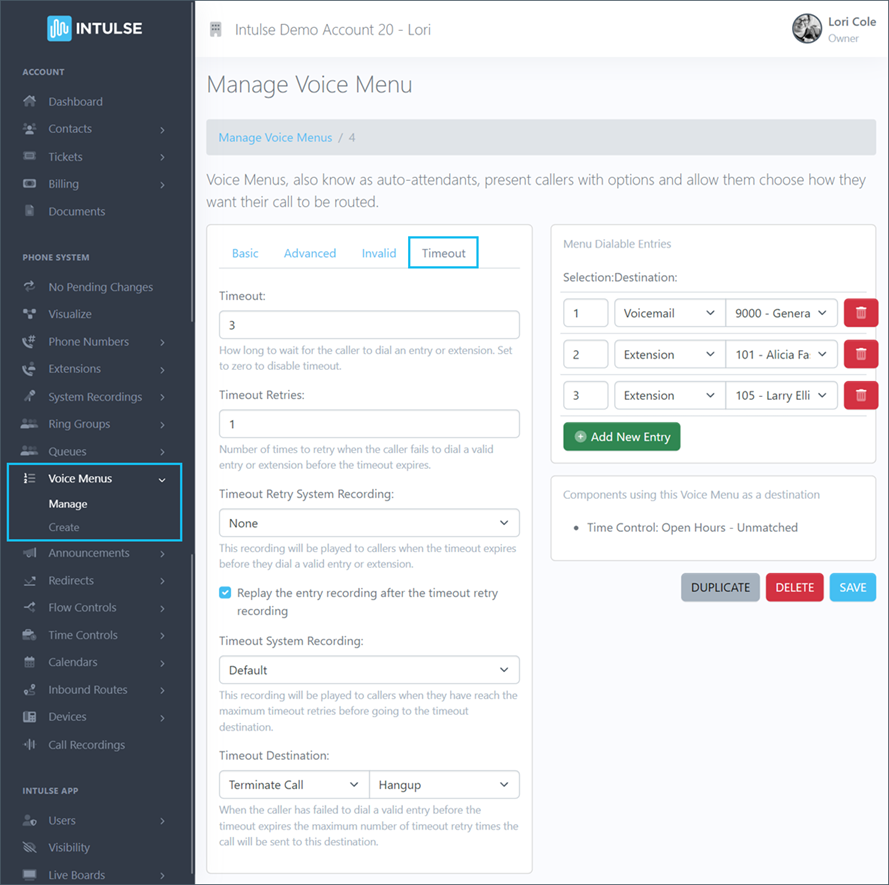
"Timeout" Settings include:
Now let's look at the portion of the screen that allows you to build your menu. Menu Dialable Entries are the options your callers will be able to select on their keypad.
For each entry, you are able to select:
When you have made all changes to your Voice Menu, make sure the recording that callers hear when they enter the voice menu matches your selected entries. Also, double check the Visualize screen to make sure your voice menu is doing what you expect it to do.
Some changes related to your phone system's behavior, such as adding or editing voice menus, are not live immediately. Rather, the changes are "queued" and waiting to be applied. This allows you to make ALL of the necessary changes and verify that all pieces of the call flow are in place and functioning together as expected before making them live. Once you've tested your changes and are confident your system is functioning correctly, select "Apply Changes" on the left-hand menu to make your system live. A confirmation popup will open asking if you're certain you wish to apply your changes.
