Inbound Routes serve as the entry point for all calls coming into your phone system. An inbound route tells the system where to direct a call based either on the phone number being dialed or the caller ID of the person calling.
Inbound routes can be set up based on the number the call is coming FROM or the number the call is made TO. An inbound route should also be set up for ANY number calling to ANY number being called. This means that any call coming into your organization which doesn't fit one of the FROM patterns or one of the TO patterns, will follow this generic route.
Administrators have access to the inbound routes for your organization using the Account Center. Locate Inbound Routes in the Phone System menu and expand the heading. Here you will see options to both Manage and Create inbound routes.
A video showing you how to set up and manage inbound routes can be found on the Create Inbound Routes support page.
The Manage Inbound Routes page will allow you to view and manage any inbound routes that currently exist for your organization.
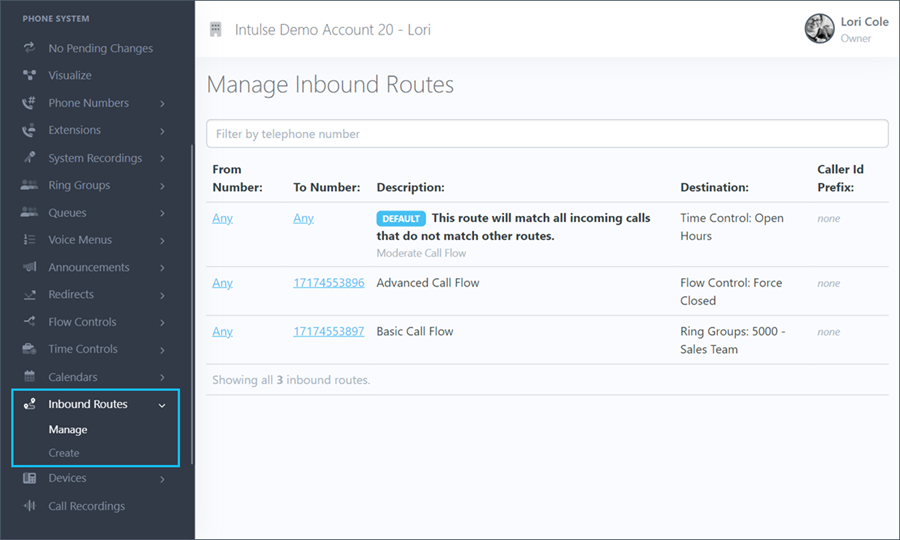
Click on the name of the inbound route you would like to edit. This will open the file for that route, allowing you to update basic and advanced setting options.
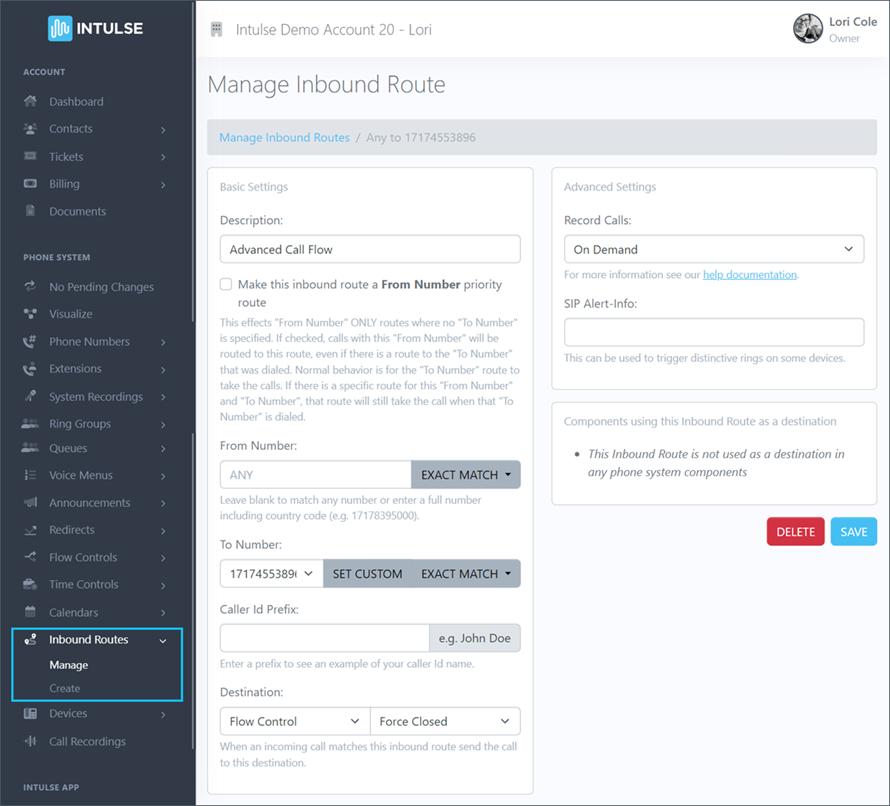
The basic settings will allow you to update:
When creating an inbound route, you'll define which phone numbers the route should apply to and whether the system should look for an exact match or a pattern match. For more detailed information about Exact vs Pattern Match and From, To, and Any Routes, see the Create Inbound Routes page.
When entering the phone number, you MUST include a country code. Do NOT use any dashes or spaces when entering the number.
The advanced settings will allow you to update:
You will also see a field informing you of where this inbound route is being utilized in your current call flow.
Some changes related to your phone system's behavior, such as adding or editing inbound routes, are not live immediately. Rather, the changes are "queued" and waiting to be applied. This allows you to make ALL of the necessary changes and verify that all pieces of the call flow are in place and functioning together as expected before making them live. Once you've tested your changes and are confident your system is functioning correctly, select "Apply Changes" on the left-hand menu to make your system live. A confirmation popup will open asking if you're certain you wish to apply your changes.
