Each phone system comes equipped with three standard calendars: Holidays, Open Hours, and Special Closures. You can also create other calendars specific to your organization. The purpose of these calendars is to inform the phone system whether an organization is open or closed. Once the calendars have been populated with events specific to an organization, they can be linked to time controls, which will direct incoming calls accordingly.
For example, when an organization’s hours of operation have been added to the “Open Hours” calendar, that calendar can be linked to a time control set to send calls to a ring group when the organization is open, and to a voicemail box when it is closed.
System administrators have the ability to add events to the existing calendars in the Account Center. Locate Calendars in the Phone System menu and expand the heading. Here you will see the option to Manage calendars.
A video showing you how to create and manage calendars can be found on the Create Calendars support page.
The Manage Calendars section is where you can access the calendars for your organization, allowing you to add, view, and edit events.
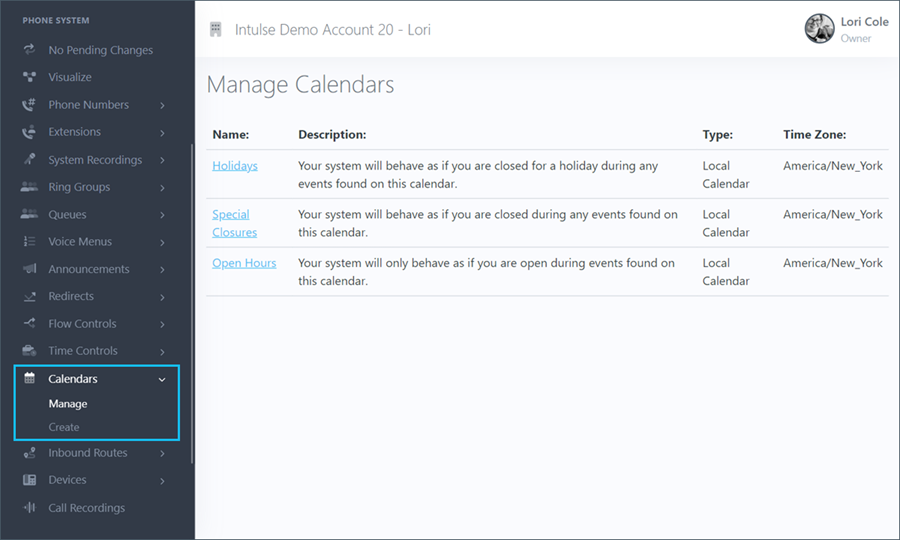
Select one of your calendars to begin adding details. This will open your blank calendar.
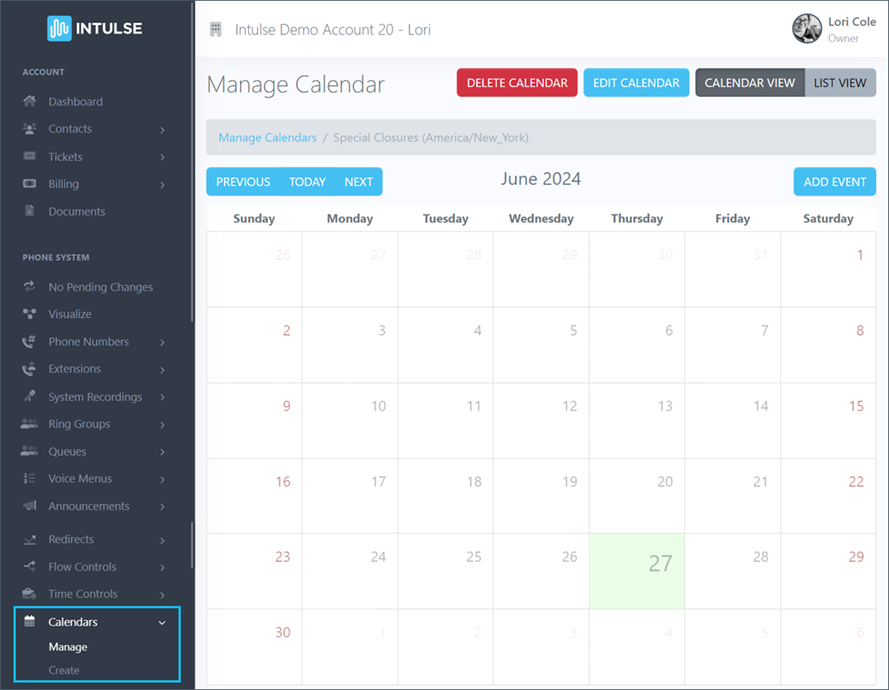
From there, select the "Add Event" button ...

... and begin populating your calendar's details.
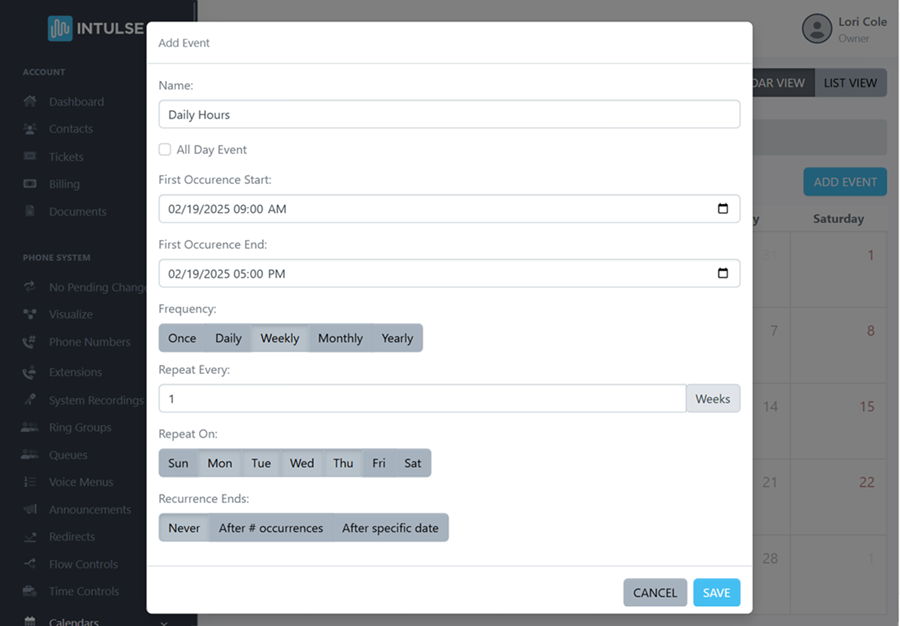
Follow these steps to add a new event to your calendar:
If you want to set up your daily open hours, enter the hours your phone system should consider your organization open. Select weekly and enter repeat every 1 week. Select the days you will be open during those hours. If you have different hours on different days, create a different event for the day(s) with different hours. Be sure to select the correct days for your different time frames.
The Calendar View allows you to see any events created for that calendar. On the example below, you can see that Open Hours have been created for each Monday through Thursday. The red badge on each date tells you how many events have been created for that date. Selecting a badge will show you the event name, which you can then click on to edit.
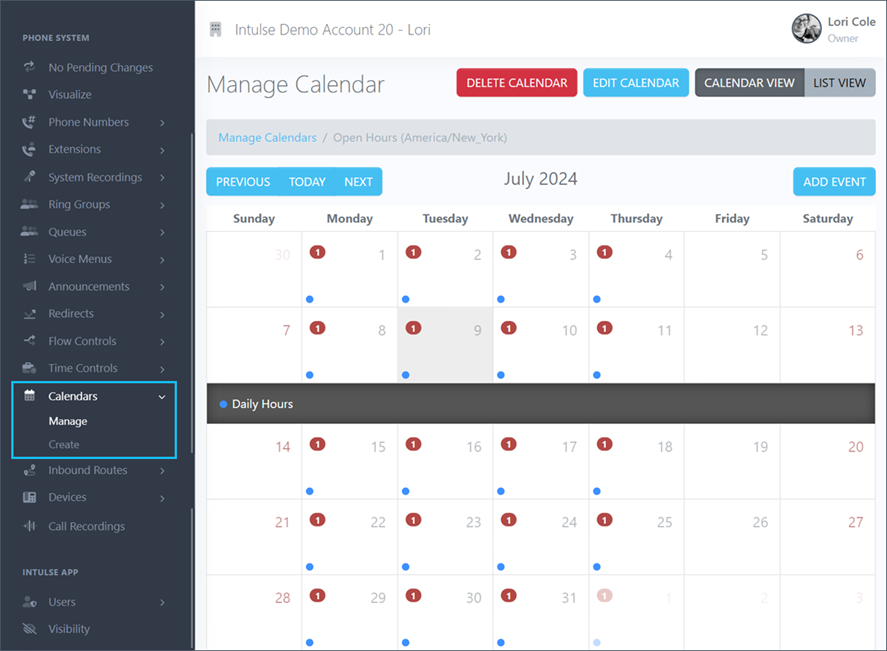
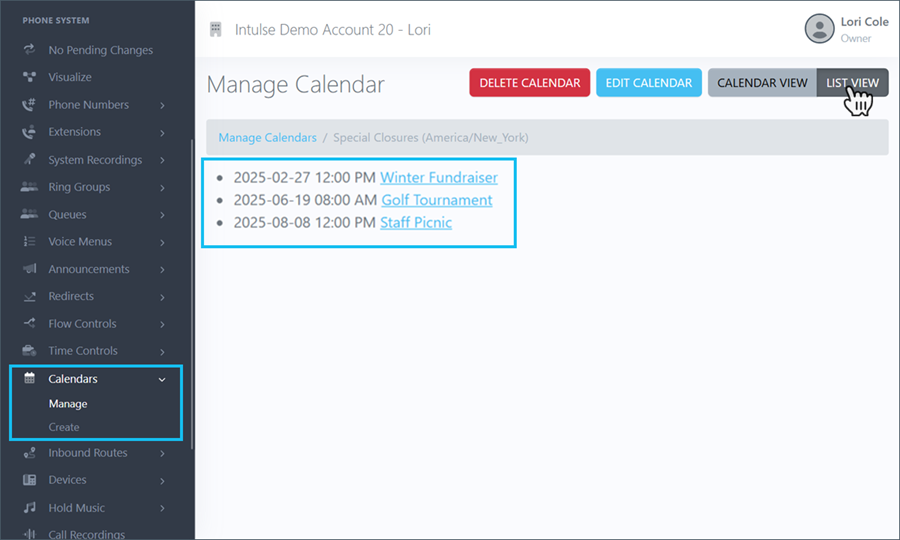
The List View allows you to see a list of events created for that calendar. In this example, you can see that a separate Open Hours event has been created for Fridays because this organization has different hours on a Friday than it does throughout the rest of the week. Again, clicking on the name of the event will allow you to edit that event.
Once your calendars have been set up with the necessary events for your organization, you will need to create a time control and link the related calendar. More information on time controls can be found here.
