A ring group allows any incoming calls to be directed to a specific team of people, such as a sales team, support team, billing team, etc. Calls can be sent to extensions or phone numbers, including mobile devices, when a single extension is dialed or a selection is made in a voice menu. Ring groups can be set up to call members of the group one at a time, or all at once.
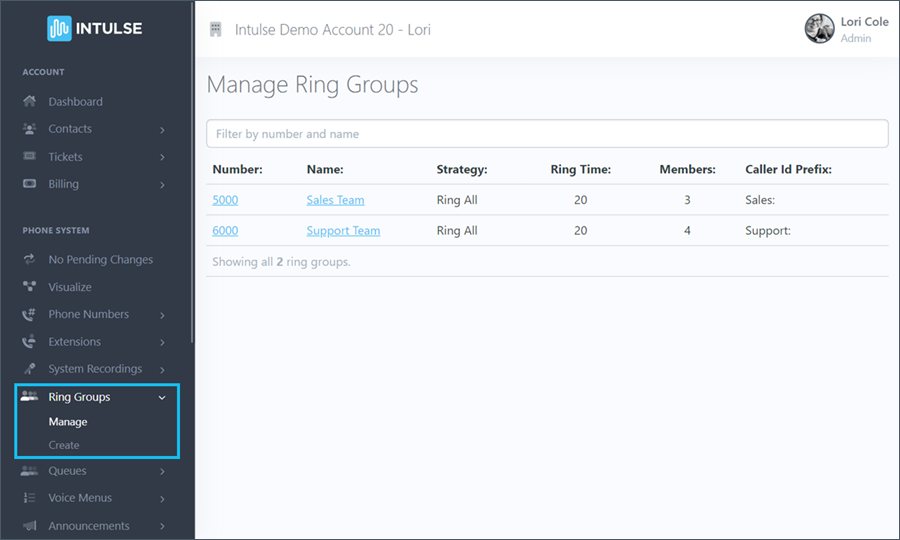
Administrators have full access to the ring groups for your organization using the Account Center. Locate Ring Groups in the Phone System menu and expand the heading. Here you will see options to both Manage and Create ring groups.
The Manage Ring Groups page will allow you to view any ring groups that currently exist for your organization. Clicking on a ring group will allow you to edit its settings, including any extensions or phone numbers that are included in that group.

For detailed explanations of each field, see the Create Ring Groups support page. All fields are thoroughly covered there.
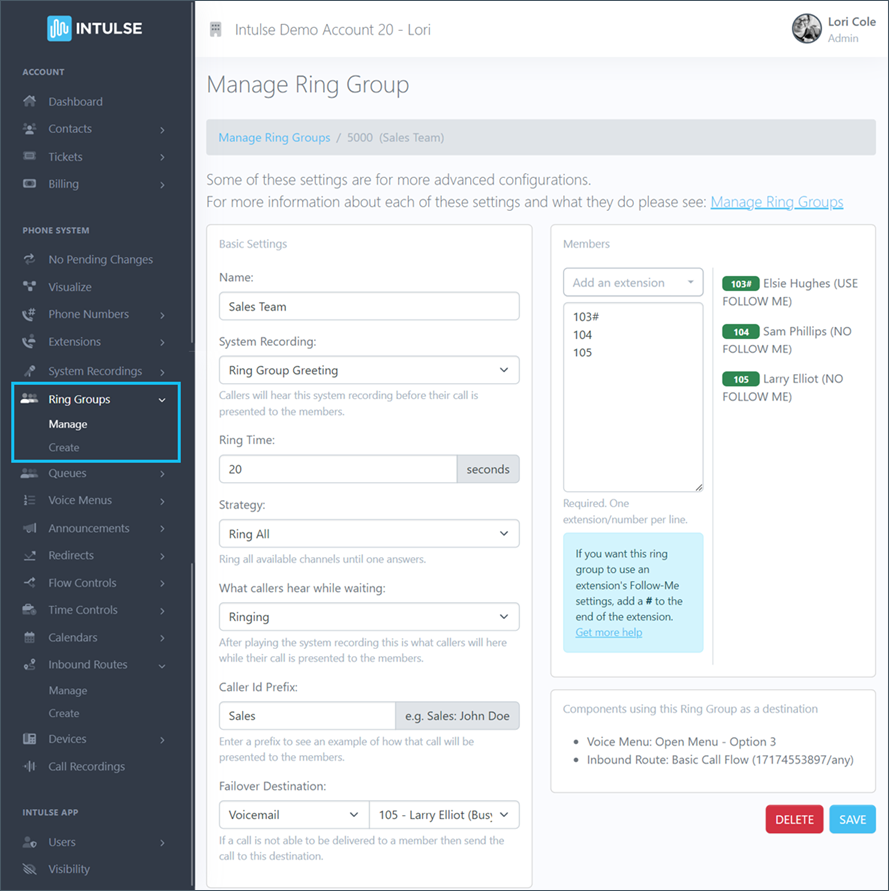
You are able to edit the following information for each ring group:
You can add members using the drop-down to select extensions, or enter phone numbers directly into the field provided. Include any external numbers by adding a # to the end. For example, 7178395000# will add 7178395000 as a member to your ring group.
Ring groups will not use an extension's Follow-Me settings. If you want the ring group to use a particular extension's Follow-Me settings, add a # to the end of the extension.

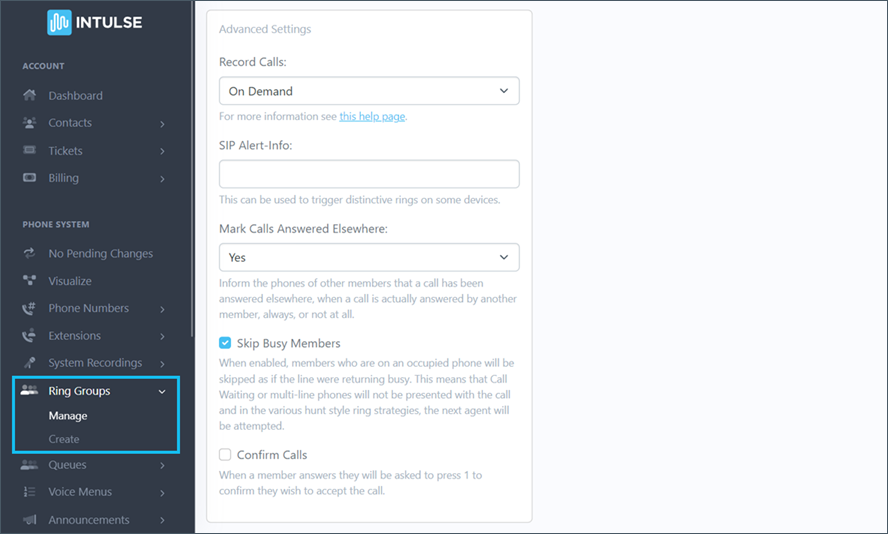
There are also some additional advanced setting options:

You will also see a message below the Members field alerting you to where this ring group is being utilized in your current call flow.
Some changes related to your phone system's behavior, such as adding or editing ring groups, are not live immediately. Rather, the changes are "queued" and waiting to be applied. This allows you to make ALL of the necessary changes and verify that all pieces of the call flow are in place and functioning together as expected before making them live. Once you've tested your changes and are confident your system is functioning correctly, select "Apply Changes" on the left-hand menu to make your system live. A confirmation popup will open asking if you're certain you wish to apply your changes.
