Administrators are able to manage, create, and monitor any extensions for your organization. Each person who makes and/or receives calls will need their own extension. Each physical phone must have its own extension, and any Users on the Intulse App must have an extension. If you need a "virtual" extension, such as a general voicemail box, Intulse will have to create that for you; just let us know.
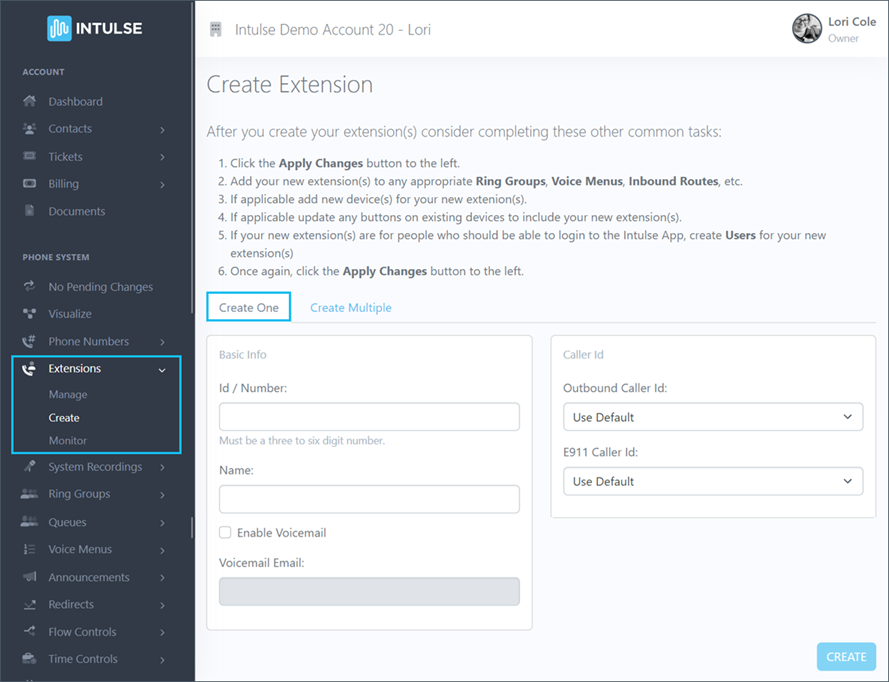
System administrators have full access to the extensions for your organization using the Account Center. Locate Extensions in the Phone System menu and expand the heading. Here you will see options to Manage, Create, and Monitor extensions.
The Create Extensions section will allow you to create new extensions for your organization. Remember that you are billed for each extension on your system. So, if you create more extensions, it will affect your bill. You can create extensions one at a time or you can create multiple extensions at once.
Extension Numbers must be between 3 and 6 digits long and cannot begin with a zero. Due to the fact that many emergency numbers begin with 9, we recommend that you avoid beginning extensions with 9.
To create one extension at a time, make sure you select the "Create One" tab at the top of the page and fill in the fields for each extension you wish to create.

To create one new extension, follow these steps:
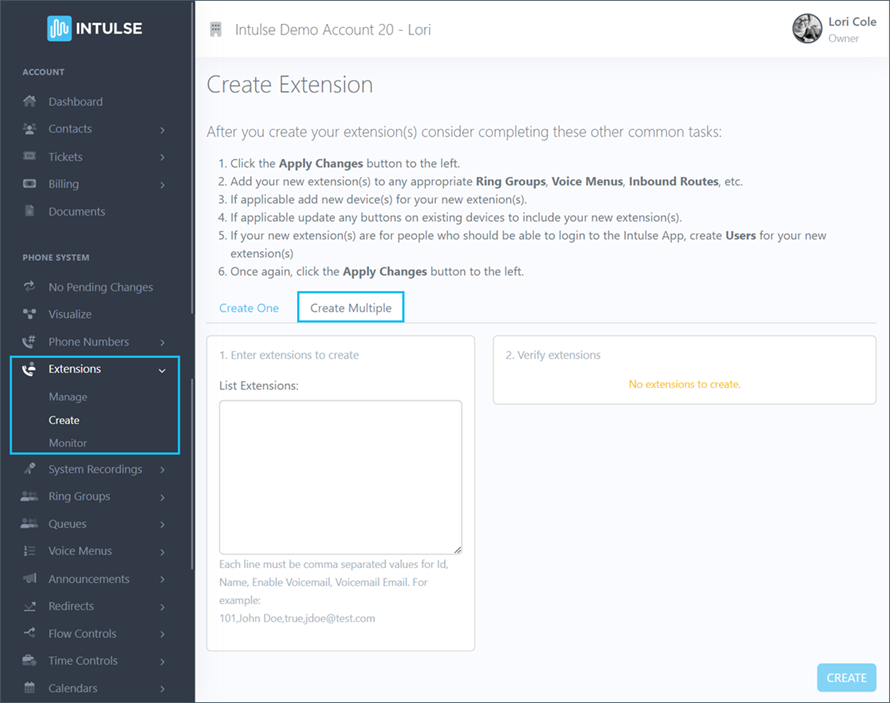
There is also a tab allowing you to create multiple extensions at once. Simply fill in the extension information as requested.

Enter each extension’s information on a separate line, with the details separated by a comma. Each entry must begin on a separate line.
Each line must be comma separated values for ExtensionNumber,Name,EnableVoicemail,VoicemailEmail.
If you want to enable voicemail for a user, enter “true” after the user’s name. If they should not have a voicemail box, enter “false” after the user’s name. FOR EXAMPLE:
Once you have entered all of the necessary extensions, click the Create button and your new extensions will appear on the "Manage" page.
Some changes related to your phone system's behavior, such as adding or editing extensions, are not live immediately. Rather, the changes are "queued" and waiting to be applied. Go ahead and select the Apply Changes option on the left-hand menu once you've added all of your extensions. A confirmation popup will open asking if you're certain you wish to apply your changes. You extensions will then be live and can be added to other system features such as ring groups, voice menus, etc. You will also be able to create users for these extensions in the app.
