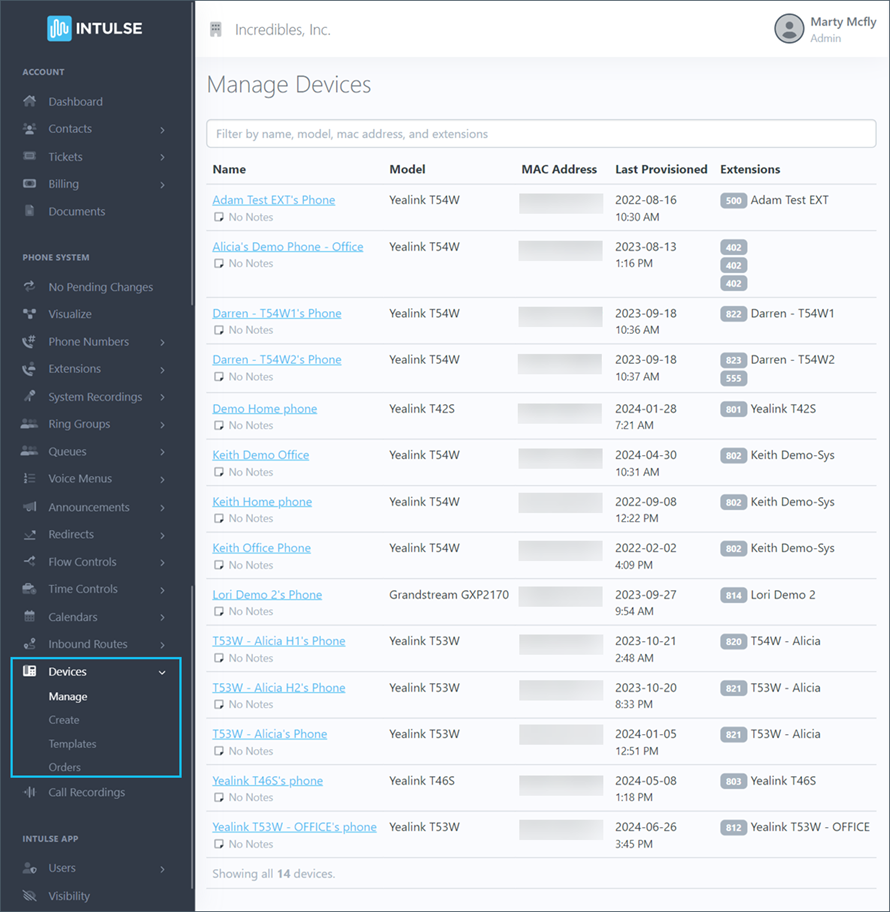
The Devices section of the Account Center allows you to view and manage all of the devices associated with your Intulse account. From this page you are able to manage existing devices, create a new device in your account, view the template for any phone Intulse is able to support, and place of view a device order.
To access this information in the Account Center, locate Devices in the Phone System menu and expand the heading. Here you will see the following options: Manage, Create, Templates, and Orders.
The Manage Devices section allows you to fully manage your devices with Intulse. You will see a list of all devices associated with your organization, along with some details about each phone.

For each device, you are able to see:
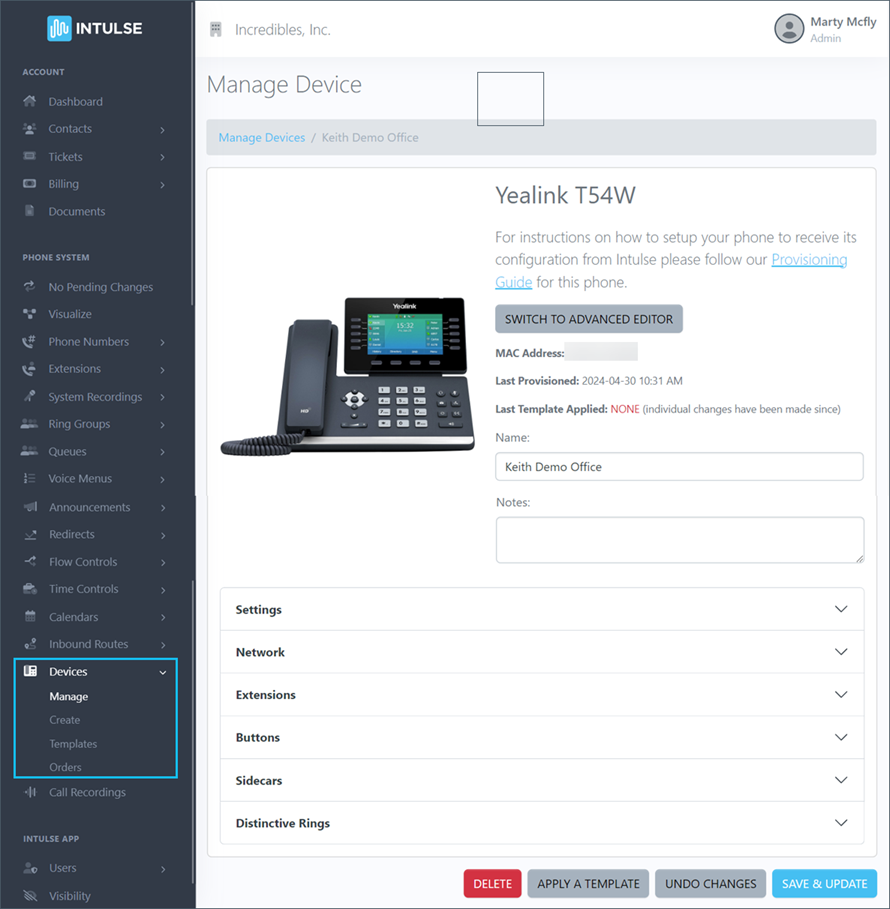
Clicking on a device name will allow you to view the device settings.

The top of the page includes a photo of the device as well as the device model number, MAC Address, the date it was Last Provisioned, and the Last Template Applied to the device. There are also fields for you to update the device name and add any notes about the device.
There are several additional sections for setting up a physical device.
This section allows you to change a few general settings of the phone such as the Timezone, any Enhanced DSS Keys, User Protection, and the Default Ringtone.
This section allows you to change specific network parameters for your phone. You are able to change the type of network address assignment from DHCP to Static, as well as the Static DNS settings.
WARNING: Nearly 100% of Intulse clients do not need to change anything in this area. Changing settings in this area incorrectly can render your phone inoperable and your phone may need to be factory reset.
This section allows you to manage the extensions assigned to a specific device. In most cases, that is only one extension. You can assign an extension name, or add another extension to the phone by clicking the Add Extension button.
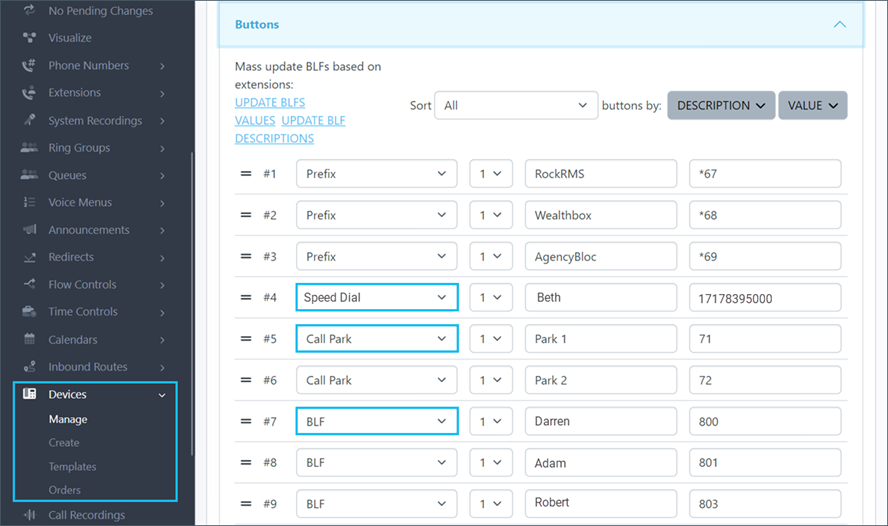
This section allows you to create, remove and rearrange your own buttons on your device. Each line is numbered in order of how the buttons will be displayed on the phone and each line is "Drag and drop". This means that rearranging buttons on your phone is simple. Simply click and drag the buttons to rearrange them however you choose.

In many cases, clients utilize only a few button types. The most popular types are:
To create a new button, first select the button type. Then select the line (usually 1). Next, give the button a name. This is the name that will be displayed on your phone. In some cases, you will have to limit the length of the name so that it can properly fit on the phone screen. Finally, fill in the value (extension number) of the button. For example, if you create a BLF button for another user named Alicia, at extension 100, you would choose the following Options:
Button Type: BLF
Line: 1
Description: Alicia
Value: 100
This allows you to add a sidecar to your phone, which allows you to expand the number of line buttons available for use with your device.
If you have entered SIP alert information in any ring groups or inbound routes, this is where you will connect that to your physical phone. Enter the same text you entered into the ring group or inbound route SIP Alert field. (This must match exactly). Then select the ring tone you would like to use for that alert.
