Flow Controls provide a simple way to manually change how incoming calls are routed. Each Flow Control has two paths: Normal and Override. The Normal path follows your regular call flow. When you switch the Flow Control to Override, incoming calls are automatically redirected to the alternate destination you've configured.
Unlike automated Time Controls, which follow a set schedule, Flow Controls let you change your call routing whenever you need to. This can be useful for unexpected office closures, staff training days, special events, or temporarily accepting calls outside of your regular business hours.
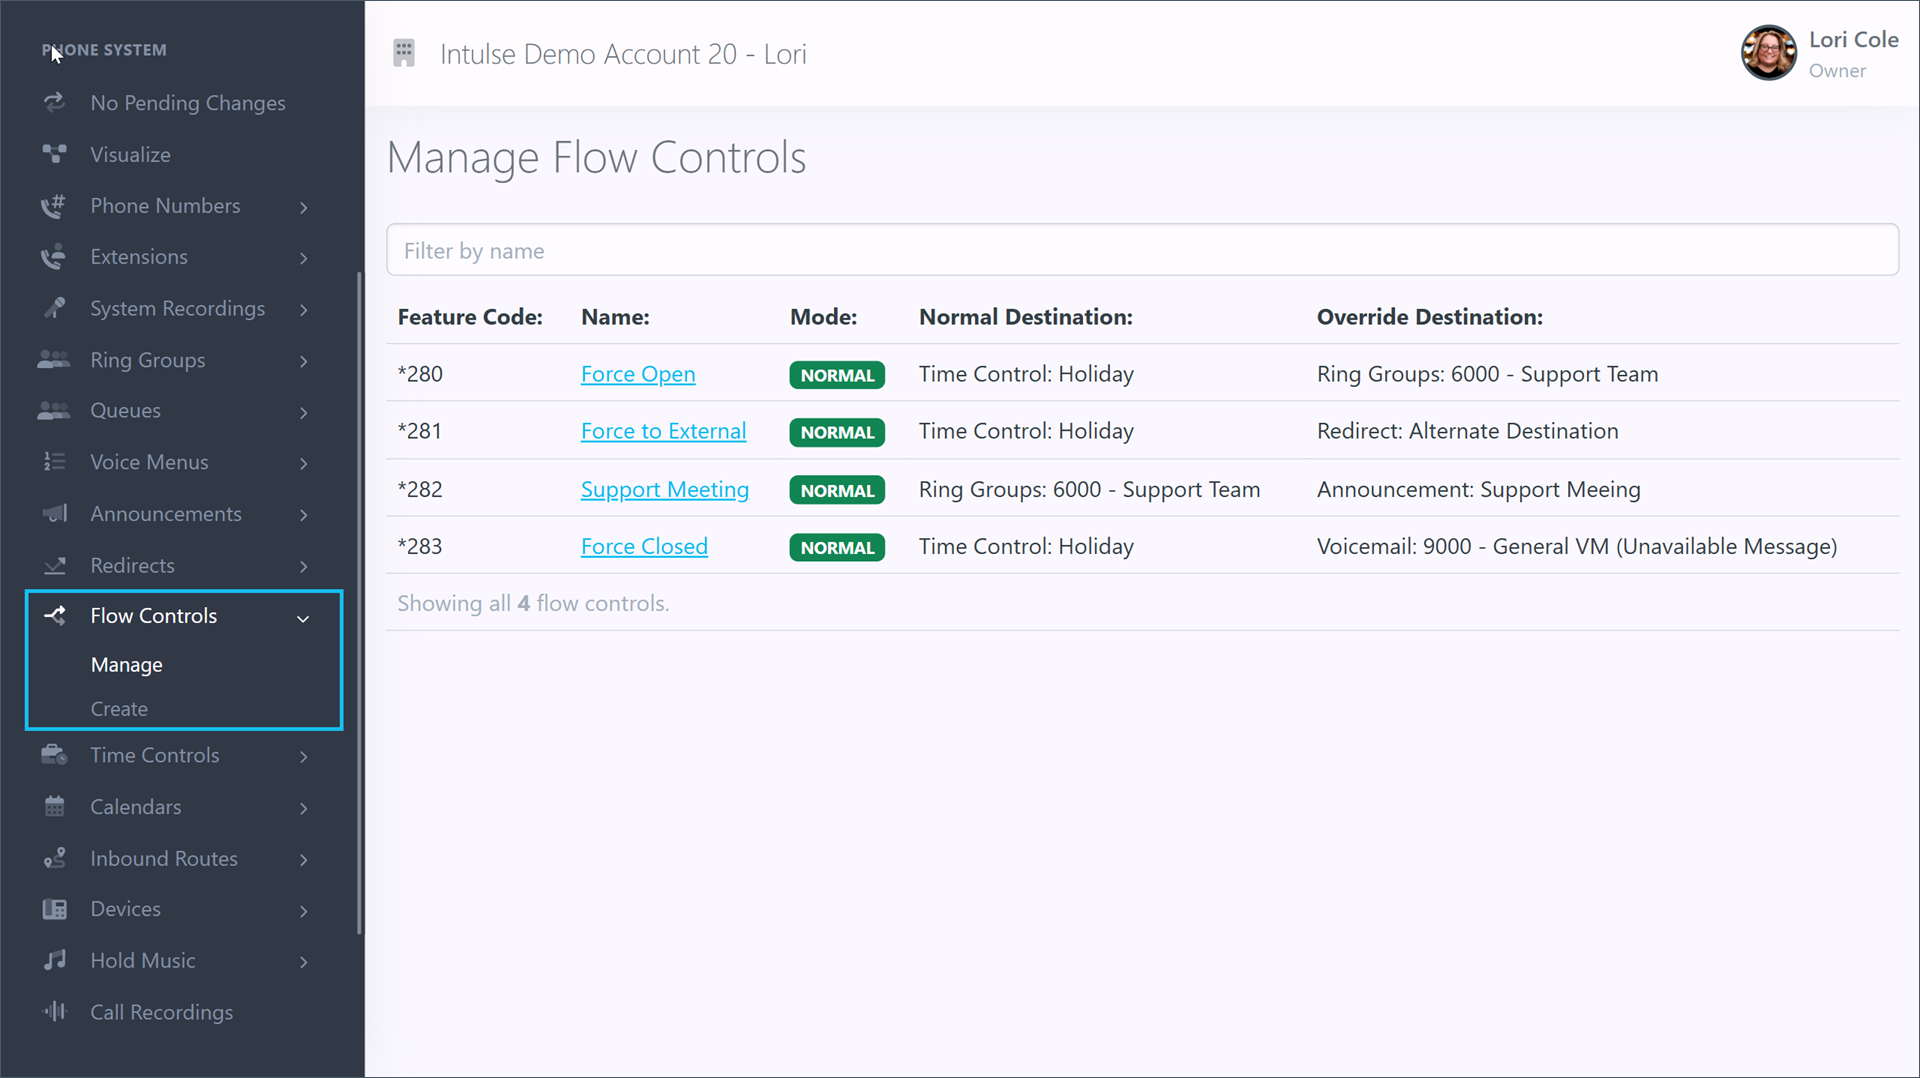
System administrators are able to manage existing flow controls, as well as create new ones, in the Account Center. Locate Flow Controls in the Phone System menu and expand the heading. Here you will see options to both Manage and Create flow controls.
Before creating a Flow Control, it helps to think about how you want calls to be handled both when the Flow Control is set to Normal and when it is switched to Override.
Before you select these destinations, make sure everything you plan to use in each path has already been created.
The Manage Flow Controls page will allow you to view any flow controls that currently exist for your organization. Clicking on a flow control will allow you to edit its settings, including any locations to which calls are being directed.
Within the settings of a flow control, you will be able to edit both basic and advanced setting options.
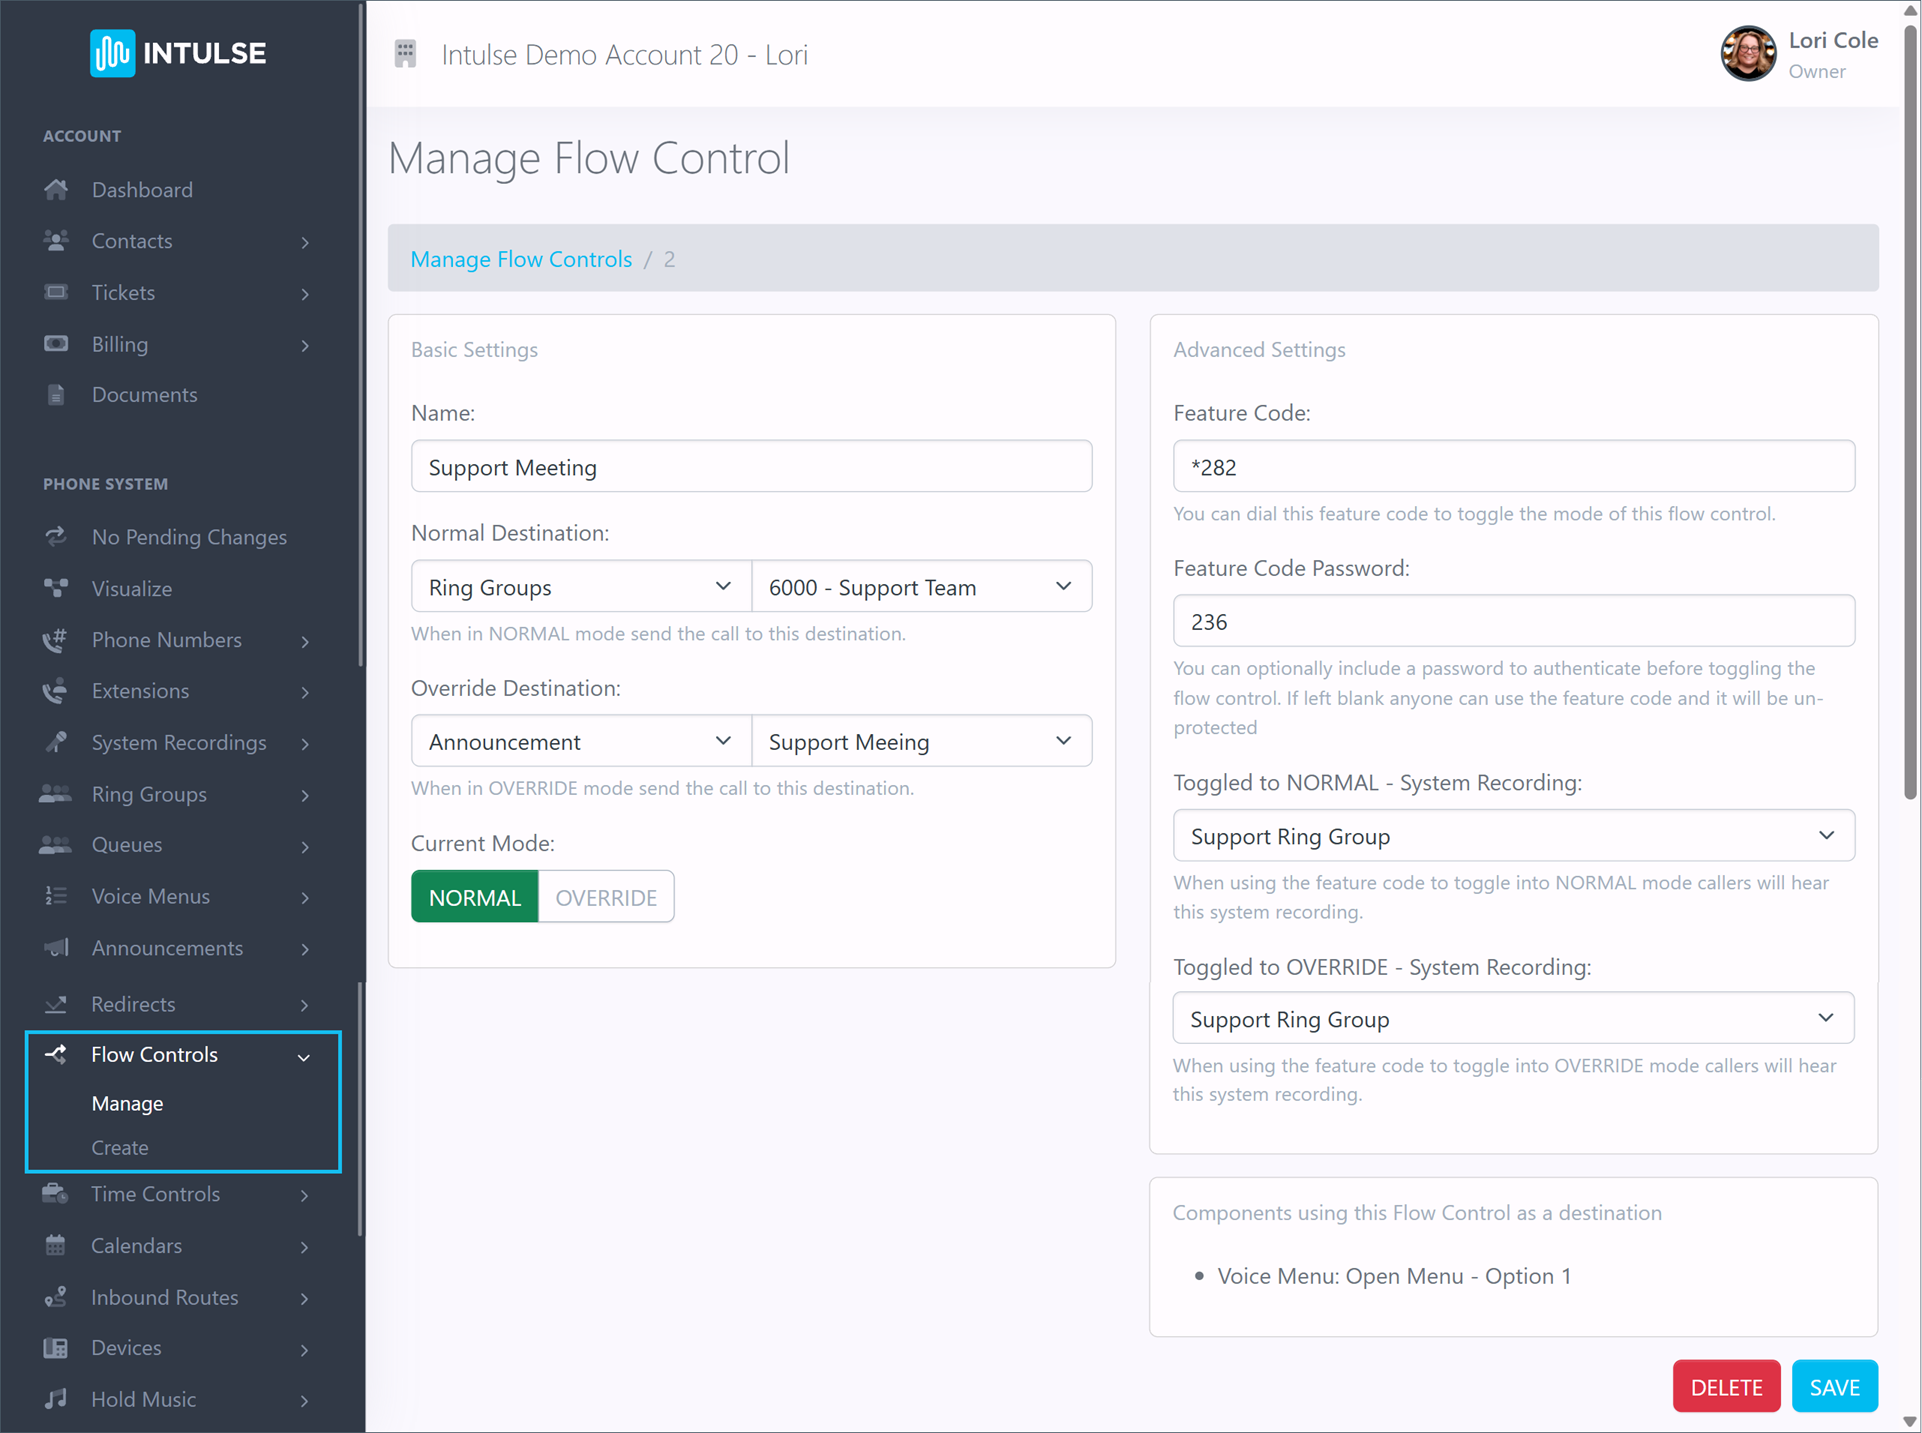
First, let's take a look at the Basic Settings for this Flow Control.
There are a few more optional settings that can be adjusted for your Flow Control.
You will also see a field below the the advanced settings informing you of where this flow control is being utilized in your current call flow.
Some changes related to your phone system's behavior, such as adding or editing flow controls, are not live immediately. Rather, the changes are "queued" and waiting to be applied. This allows you to make ALL of the necessary changes and verify that all pieces of the call flow are in place and functioning together as expected before making them live. Once you've tested your changes and are confident your system is functioning correctly, select "Apply Changes" on the left-hand menu to make your system live. A confirmation popup will open asking if you're certain you wish to apply your changes.
