Flow controls can be toggled between "Normal" and "Override" modes, which allows administrators to control the flow of calls coming into your organization. These are manually controlled, which is different from calendar driven time controls. For example, an event on your calendar will tell a time control whether your organization is open or closed for the day. (More information about time controls can be found here.) However, a flow control is manually toggled on and off and can be used to override your time controls, allowing you to open or close your phone system outside of normally scheduled hours.
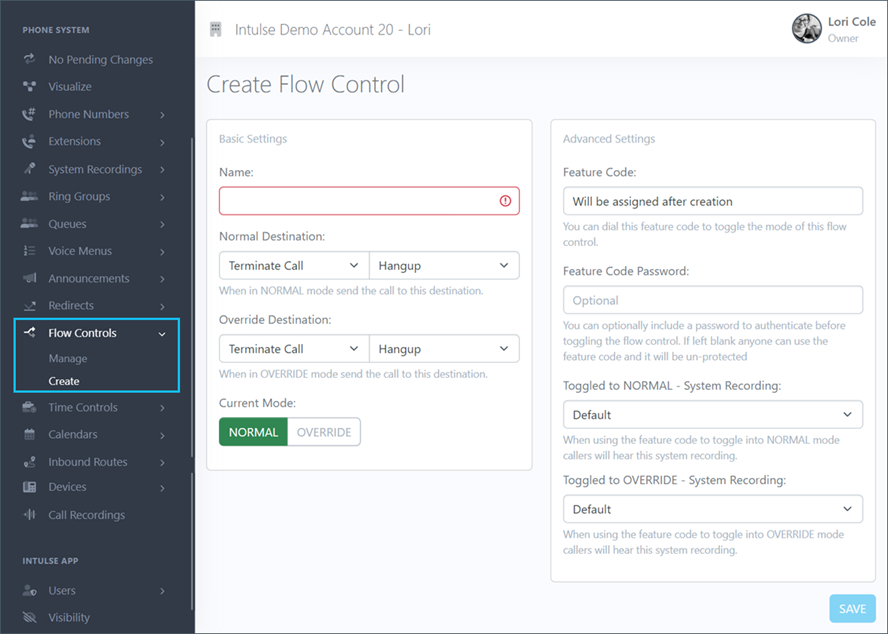
System administrators are able to manage existing flow controls, as well as create new ones, in the Account Center. Locate Flow Controls in the Phone System menu and expand the heading. Here you will see options to both Manage and Create flow controls.
The Create Flow Controls page is where you can set up a new flow control on your account, allowing you to override any time control settings. Maybe you want to be able to switch your phones off during regular business hours due to a special event. Or maybe you want to switch your system on so you can take calls outside of normal business hours. A flow control would allow you to manually toggle your phones between normal and override settings.

To set up a new flow control, follow these steps:
There are a few more optional settings for you here.
Some changes related to your phone system's behavior, such as adding or editing flow controls, are not live immediately. Rather, the changes are "queued" and waiting to be applied. This allows you to make ALL of the necessary changes and verify that all pieces of the call flow are in place and functioning together as expected before making them live. Once you've tested your changes and are confident your system is functioning correctly, select "Apply Changes" on the left-hand menu to make your system live. A confirmation popup will open asking if you're certain you wish to apply your changes.
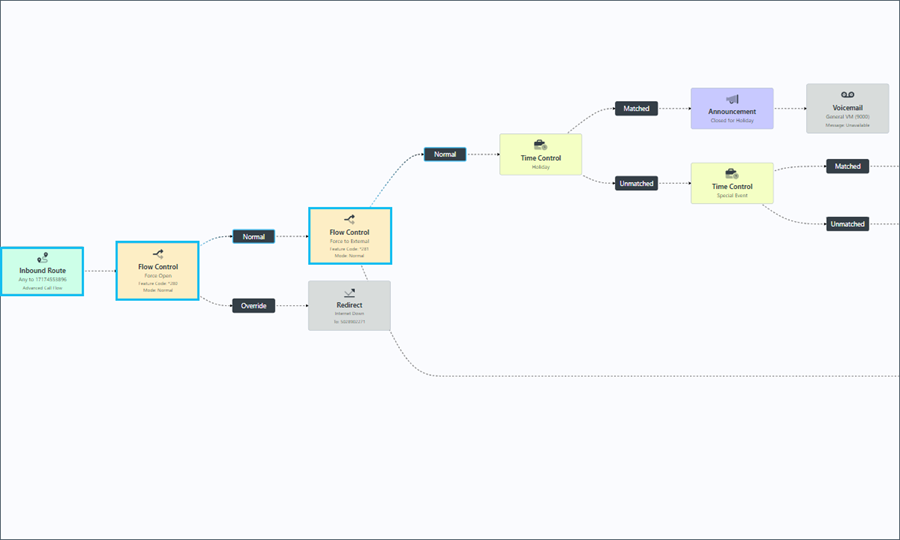
Flow controls are added to your call flow when selected within other system features. For example, in the call flow shown below, the first flow control is selected as an option within the inbound route, and the second is selected as an option within the first flow control.

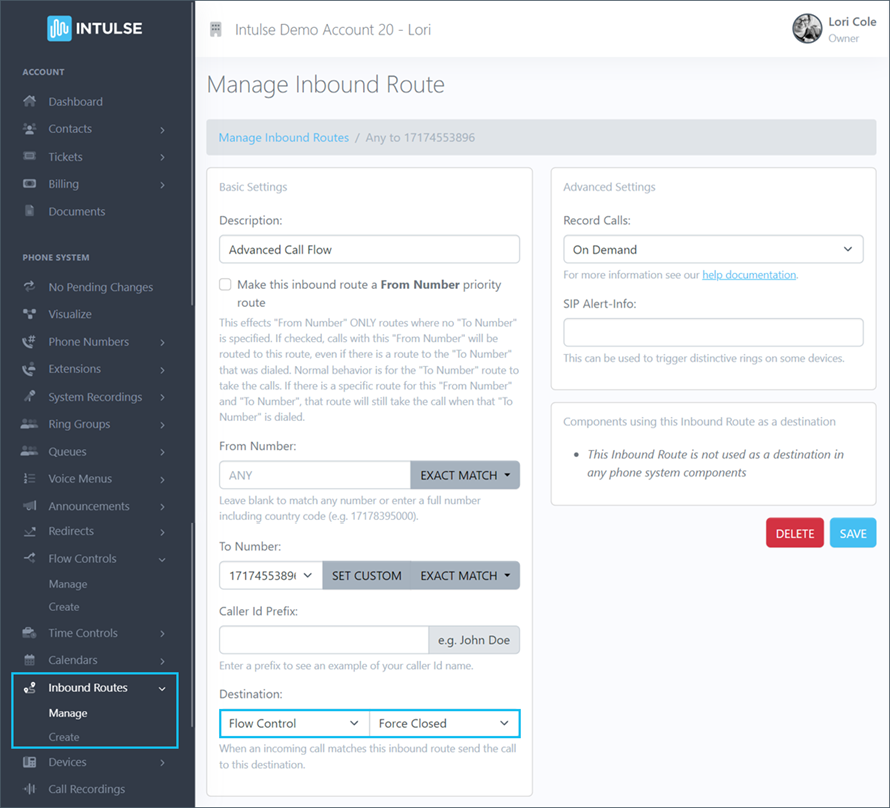
The first flow control is added by going to Inbound Routes in the Account Center or by selecting a specific inbound route on the Visualize screen. From the settings screen, you can select the flow control you would like to attach.

This is the most common use of flow controls, but they can also be used with any other system feature.
