While traditional voicemail is familiar to most, the Intulse system takes it a step further. With Intulse, you can conveniently access your voicemail not just through your desk phone, but also through the Intulse app and directly from your email — giving you flexibility no matter where you are.
☎️ VIDEO
To set up your voicemail using your desk phone instead of the app, dial *97 and follow the audio instructions. You can also access any other voicemail boxes for which you have permission, for example a general voicemail, by dialing *98 on your desk phone. You will be asked for the mailbox you wish to access, and then the PIN for that mailbox.
If you have access to multiple mailboxes, click the  to select the desired mailbox.
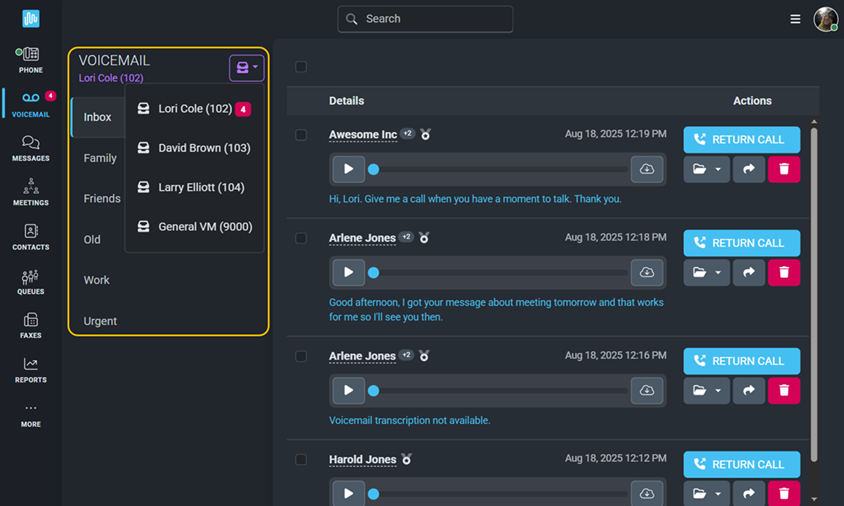
Let’s begin by taking a look at your voicemail settings and how they affect the way you receive voicemail messages. When on the voicemail screen, click the voicemail settings menu icon (three horizontal lines) to manage your voicemail settings.
When setting up your voicemail for the first time, the very first thing you will need to do is change your Voicemail Pin. The default setting for your pin is your extension number, however you will need to change that to any other number combination in order to activate your voicemail box.
There are a few different settings that relate to the notifications you receive for voicemail messages:
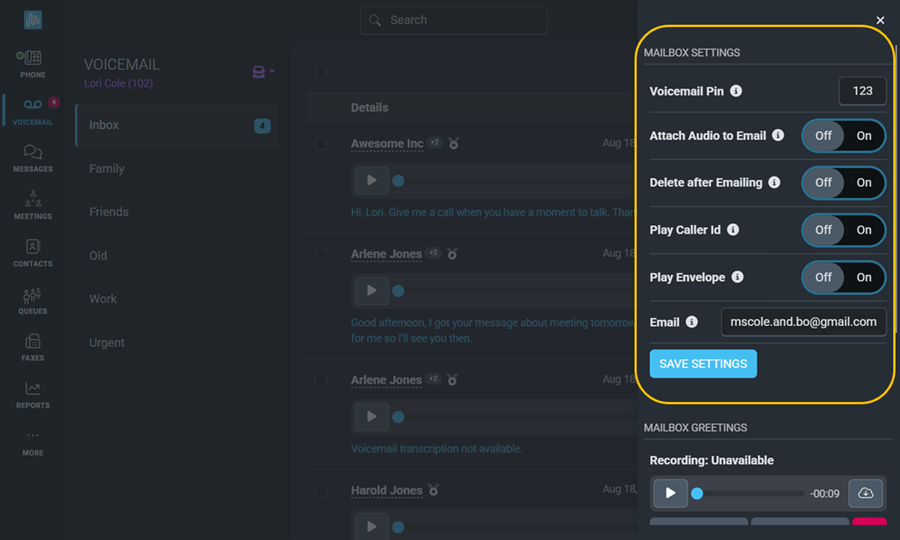
To view text transcriptions in your Voicemail Inbox, the Attach Audio setting must be turned ON. If you want transcriptions without receiving email notifications, simply turn Attach Audio ON and leave the email address field blank.
Make sure you Save these settings before moving on to the voicemail greeting messages.
There are 4 greeting messages for you to record within your voicemail system.
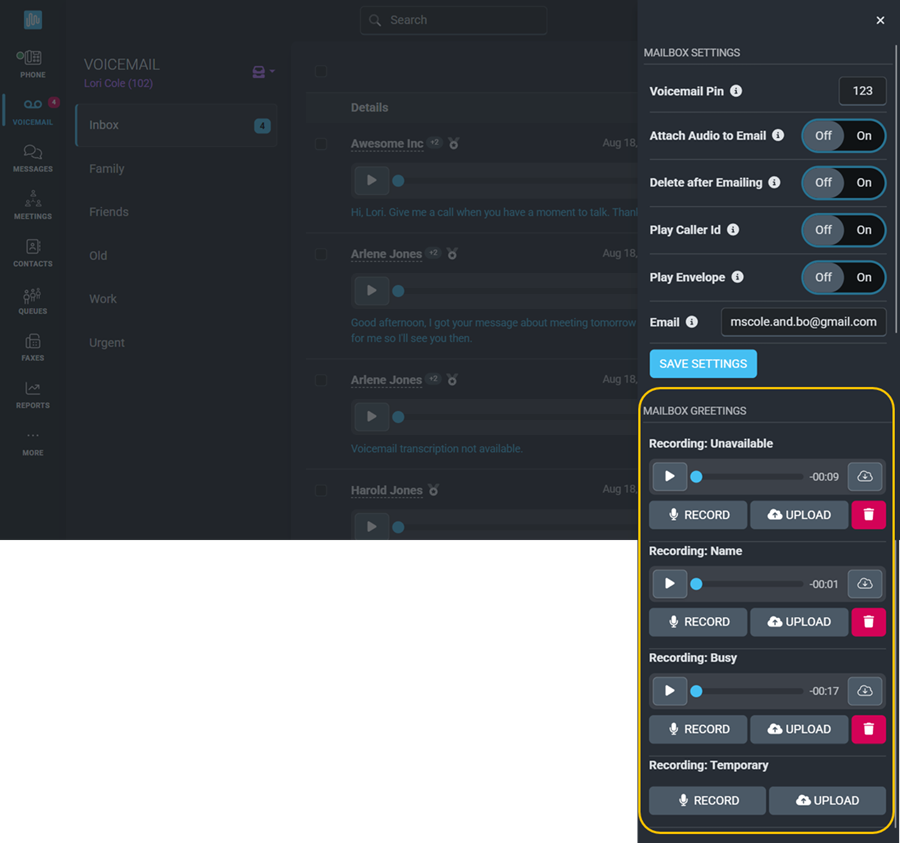
You can either Record or Upload your voicemail greetings.
To Upload a message, click Upload and select the audio file you would like to use for your greeting.
To Record your message, follow these steps:
Both audio files and text transcriptions of each voicemail are available in your inbox, where you can manage messages individually or en masse.
In order to see the text transcription in your Voicemail inbox, Attach Audio to Email must be set to On.

For each individual voicemail you are able to:
To manage multiple voicemail messages at one time, check the box at the top of the screen. Use the checkboxes to select messages to:
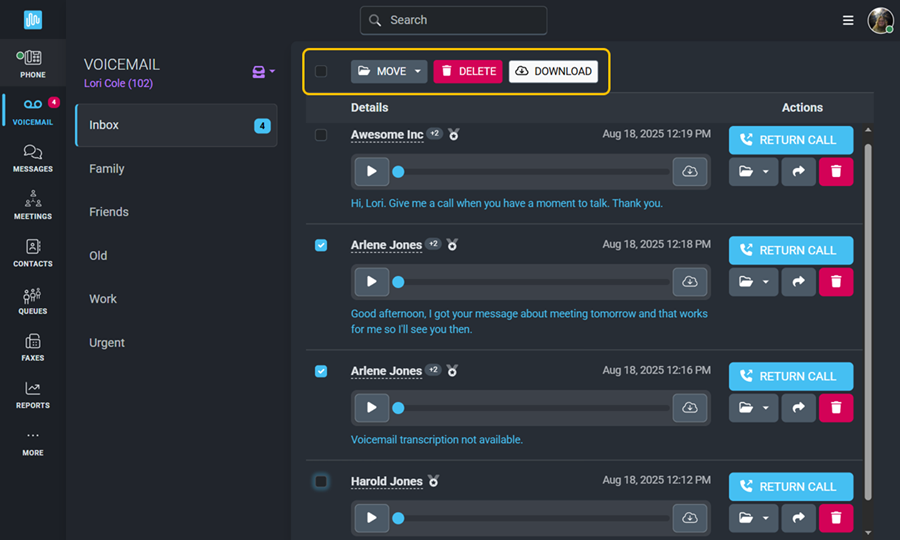
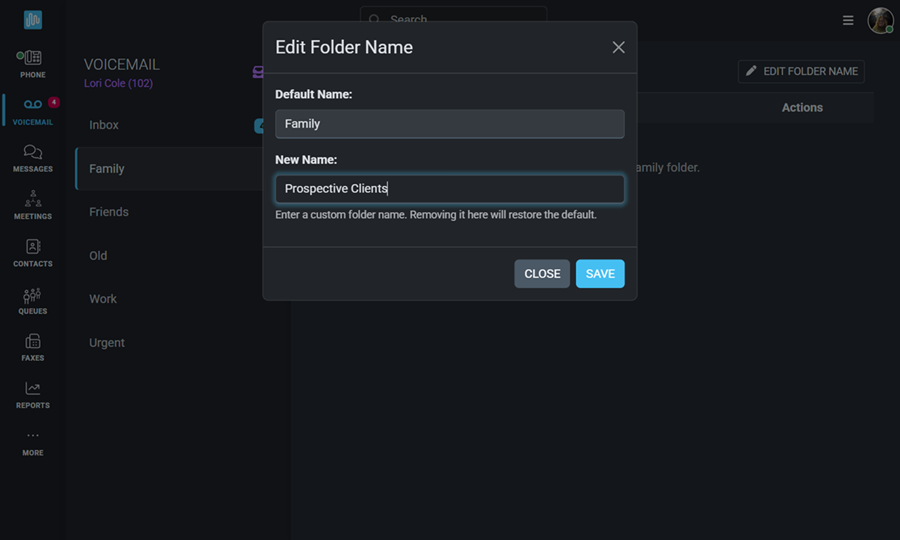
There are five different folders available to you. These are preset, but you can change the name of each folder by selecting it and clicking Edit Folder Name.
