Welcome to the Virtual Phone — your personal command center in the Intulse app! Think of this as your home base. From here, you can turn any device — computer, tablet, or smartphone — into your Intulse phone.
In this guide we’ll walk through your key settings and features so everything works exactly the way you want it. By the end, your Virtual Phone will be fully set up and ready to roll — and you’ll know exactly how to use it with confidence.
How to get here:
Let’s dive in! We’ll start by getting your Virtual Phone set up so you can make and receive calls like a pro.
☎️ VIDEO
Follow Me is helpful in many situations, such as:
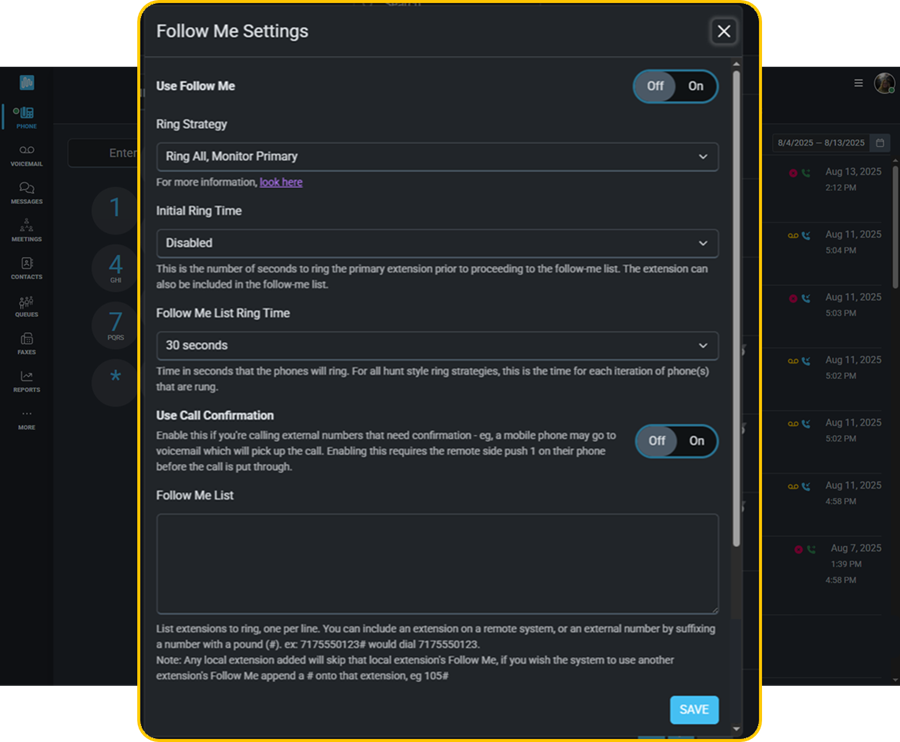
You can create a Follow Me List—a set of phone numbers (both internal extensions and external numbers like mobile phones) that the system will try in sequence or in a specific pattern to reach you.
In the Follow Me Settings, you’ll see two different ring times:
You can also choose from several Follow Me Strategies, each with its own purpose and call routing style. Click HERE to read about each option so you can select the one that best matches your needs.
If the call is not answered by anyone on the Follow Me List, it will return to your voicemail box.
When a call is sent to an extension on your Follow Me List, that extension’s Follow Me settings are ignored, and the call will not go to their voicemail. To override this, add a pound sign (#) at the end of the extension in your Follow Me List.
When adding external numbers to the Follow Me List, always add a pound sign to the end of the number.
We strongly recommend enabling Call Confirmation when sending calls to external numbers. This feature alerts the recipient that the call is business-related and requires them to press 1 to accept it. It also prevents the call from being answered by an external voicemail system, such as a personal cell phone voicemail.
Smart Monitoring is a powerful feature that lets you personalize your Phone screen to match your specific needs. Whether you're managing a team, monitoring call activity, or accessing frequently used contacts, Smart Monitoring gives you the tools to tailor your view for maximum efficiency.
What Is Smart Monitoring?
Smart Monitoring allows you to create custom groups on your Phone screen. These groups can include:
We will go over how to use Smart Monitoring when we get to Using Your Virtual Phone.
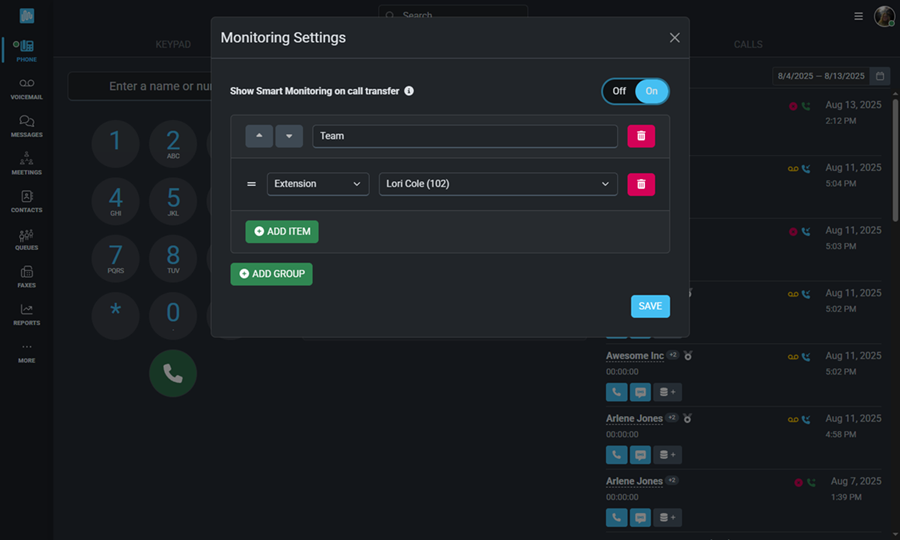
Creating groups of extensions allows you to easily monitor the current status of each user’s extension. For every extension in the group, you can see whether the user is:
Flip the Show Smart Monitoring on call transfer button to On in order to see extension, speed dial, and BLF entries displayed on the transfer screen.
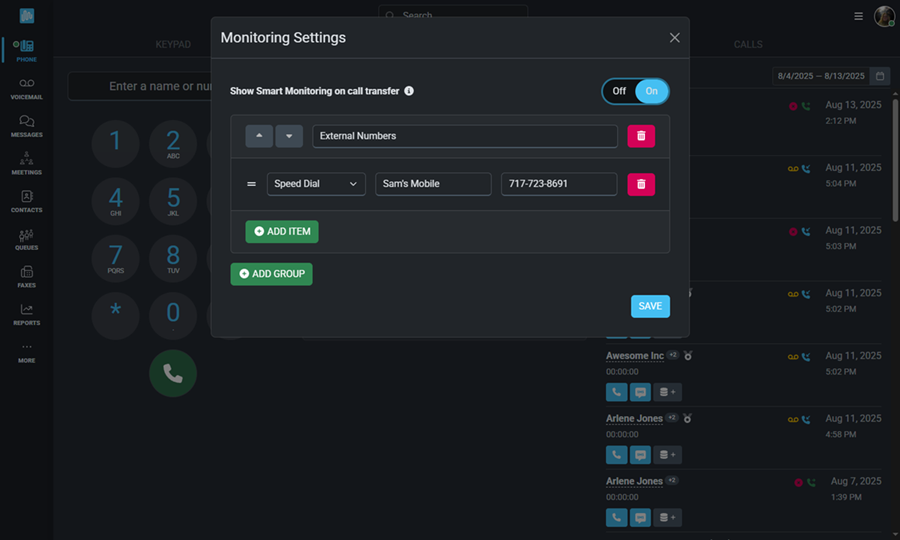
Creating Speed Dials allows you to start calls to external numbers with a single click.
Flip the Show Smart Monitoring on call transfer button to On in order to see extension, speed dial, and BLF entries displayed on the transfer screen.
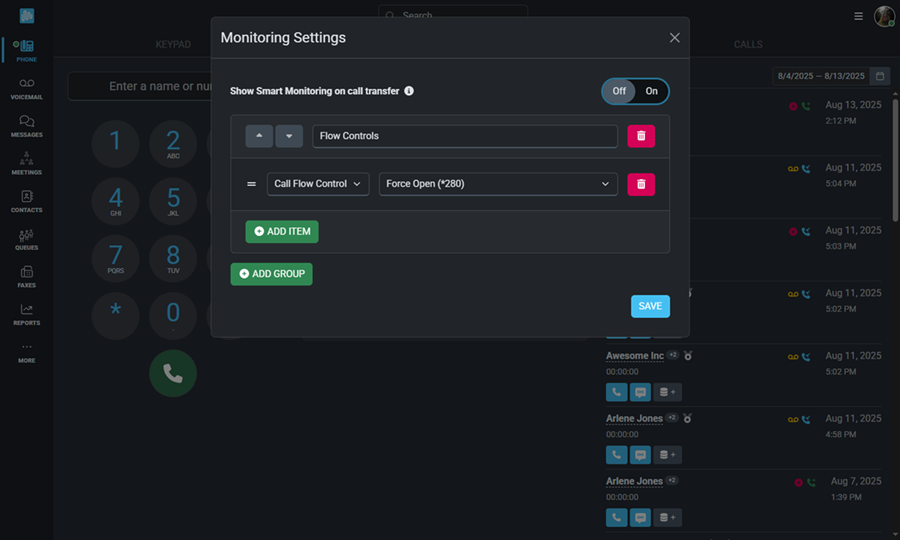
Flow Controls give you the ability to manage incoming calls more effectively. By toggling them on, you can temporarily override your system’s normal call routing to handle specific situations, such as:
Which flow controls exist for your organization is determined by your system administrator.
Adding Busy Lamp Fields, or BLFs, will allow you to monitor advanced features on your system.
Flip the Show Smart Monitoring on call transfer button to On in order to see extension, speed dial, and BLF entries displayed on the transfer screen.
Now that we've gone over all the settings, let's take a look at how to use your virtual phone.
There are 3 main sections to this screen:
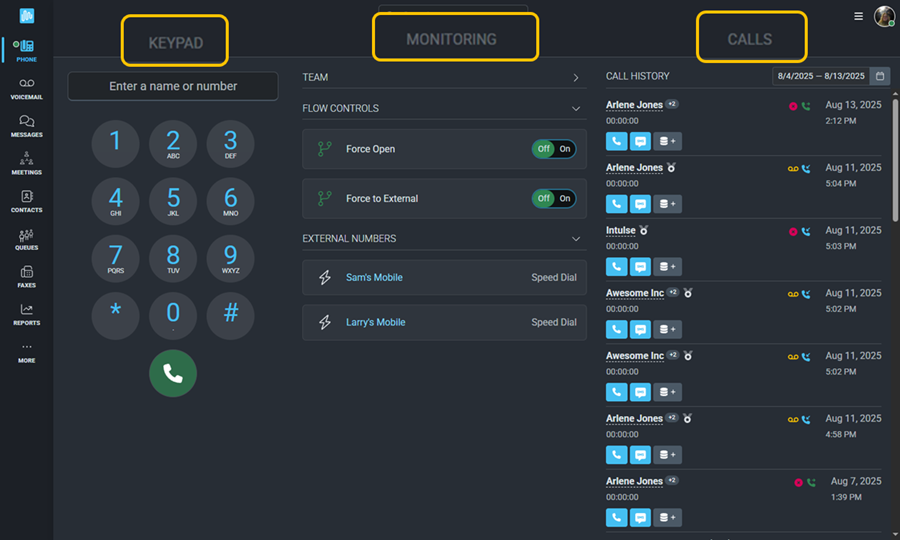
Once your Virtual Phone is enabled, the keypad will appear, allowing you to search for a contact by name or number, or manually enter a number to dial.
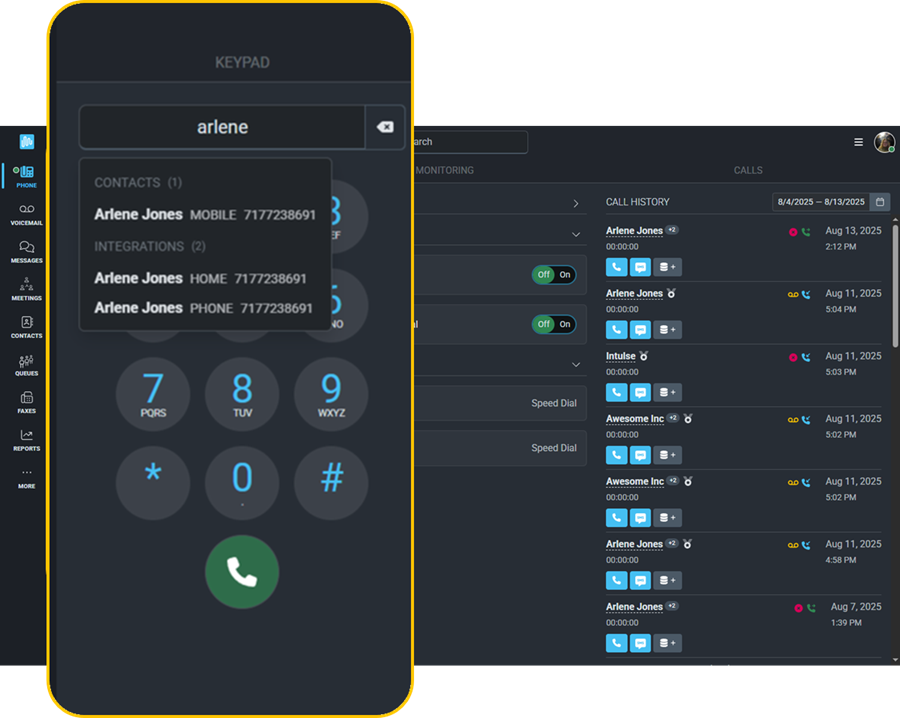
When you place a call from an enabled device, it starts directly from that device. If you start a call from a disabled device, all enabled devices will ring instead. Answer on any enabled device to connect, and you’ll hear the outgoing ringtone as the system calls the recipient.
The Monitoring portion of the screen allows you to interact with the Extensions, Speed Dials, Flow Controls, and BLFs that were set up in the previous segment of this guide.
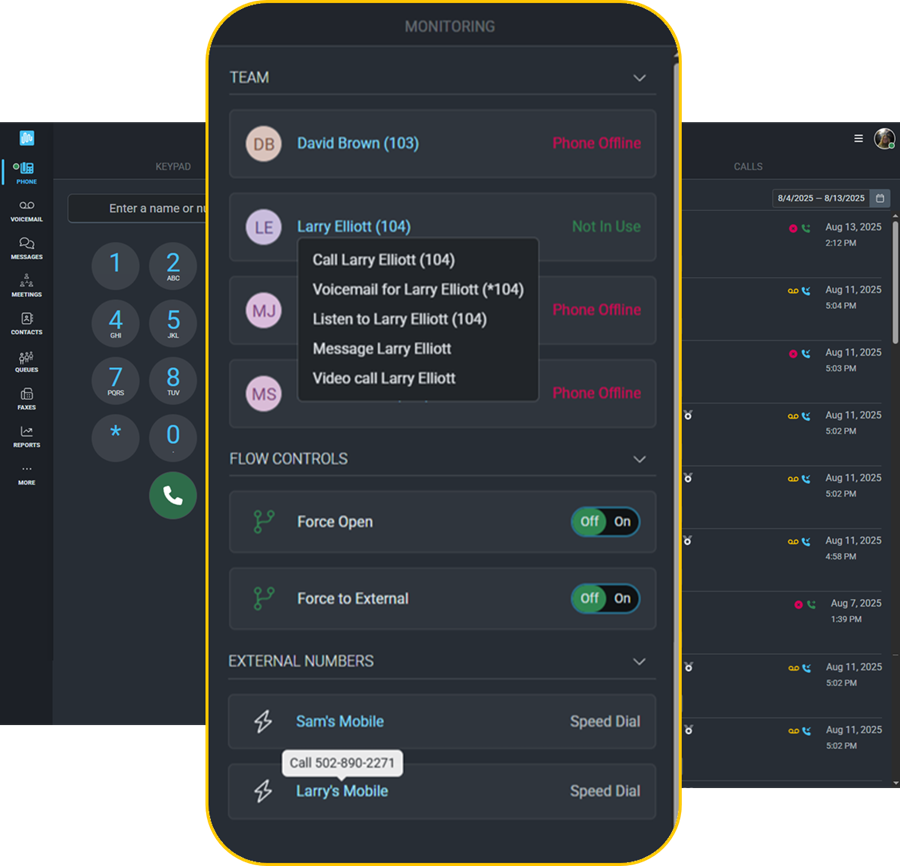
Click on the arrow beside each Smart Monitoring group to collapse or expand that group. Devices will remember which groups have been previously collapsed.
You can view the status and availability of each extension you’re monitoring. Depending on your permissions, you may also see who they are currently speaking with. Click a user’s name to interact with them.
Possible actions (vary by permissions and extension type):
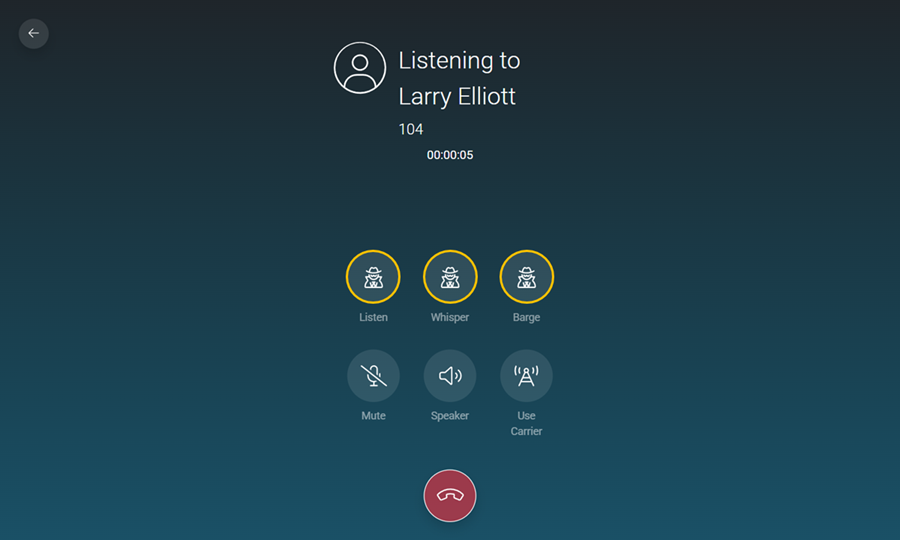
Permission for Listen/Whisper/Barge must be granted by system administrators and works as follows:
Permission to Listen, Whisper, Barge can either be granted by making someone an administrator in the Intulse App, or by going to the Admin tab in the More menu. Select Extension Monitoring Access and set permissions for specific extensions.
Speed Dials allow you to start a call with a single click. Simply click on the contact's name to initiate the call.
Manage the flow of incoming calls by toggling the switch on. When enabled, your calls will be routed through override mode until you switch it off again.
The Call History section shows the history of YOUR extension. This should not be confused with the history for your entire organization.
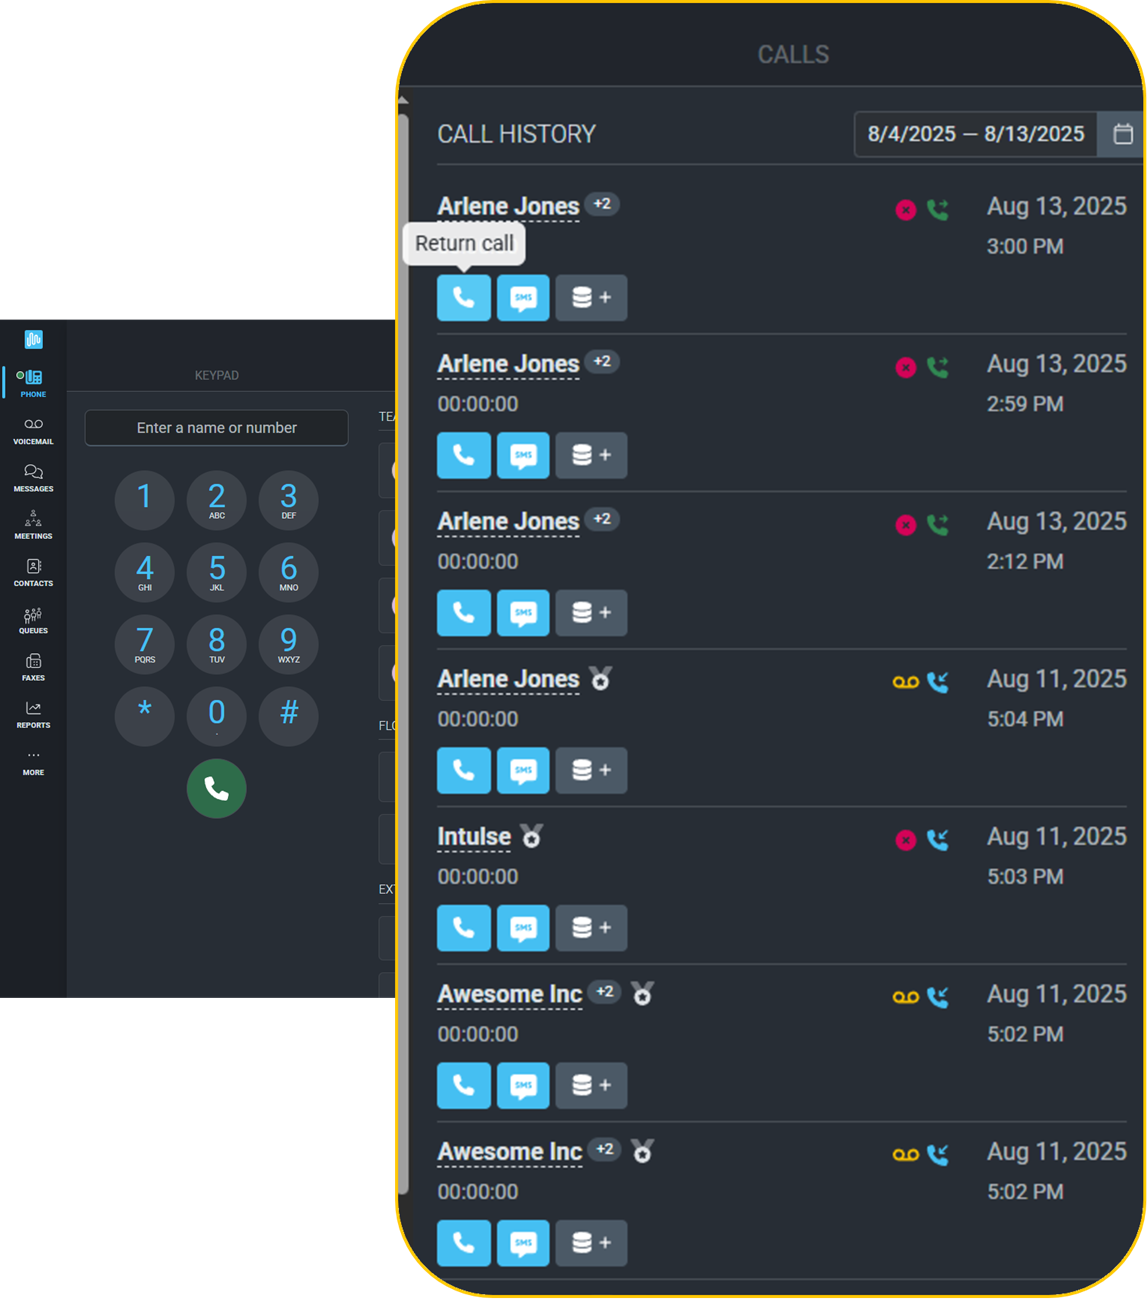
You can adjust the calls displayed using the calendar at the top of the screen. The most recent calls will appear at the top of the list.
For each call, you will see:
You can click the name or number of any external call to view that number’s call activity for the past 90 days. If the caller matches a contact in your integration, you can also view any important details stored for that contact.
All enabled phones, including your desk phone, will ring when receiving an incoming call. These calls can be answered on any enabled device.
There are options to answer or reject the call, or to respond with a message.
If you choose to respond with a Message, you will see 3 different message options.
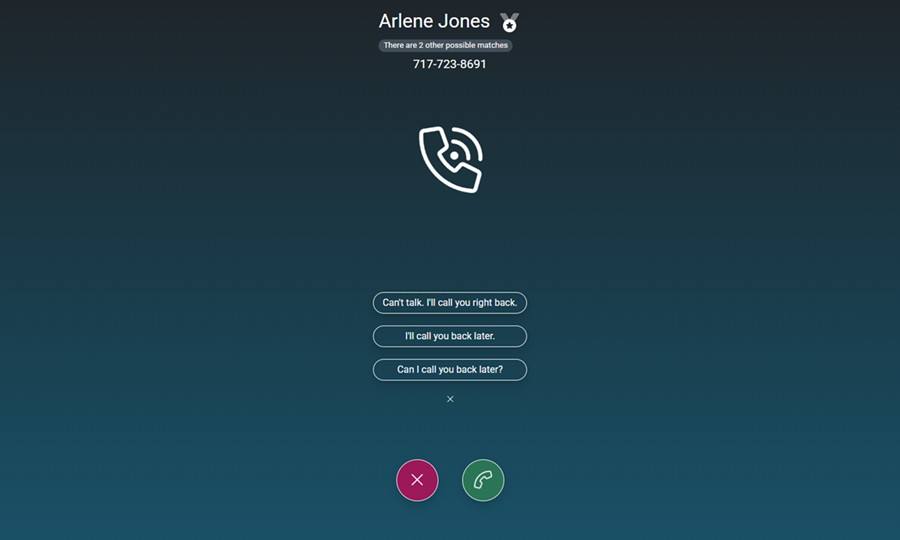
When you answer a call, the screen will display the Caller ID details and the call duration. If the phone number matches multiple contacts, this will also be indicated on the screen.
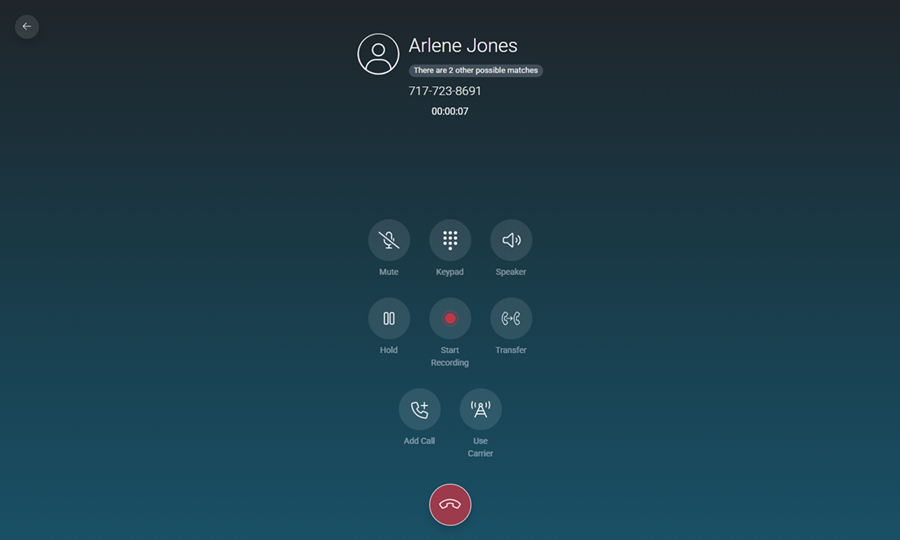
You will also see a variety of options for interacting with the call.
Click the back arrow anytime during an active call to return to the Phone Screen.
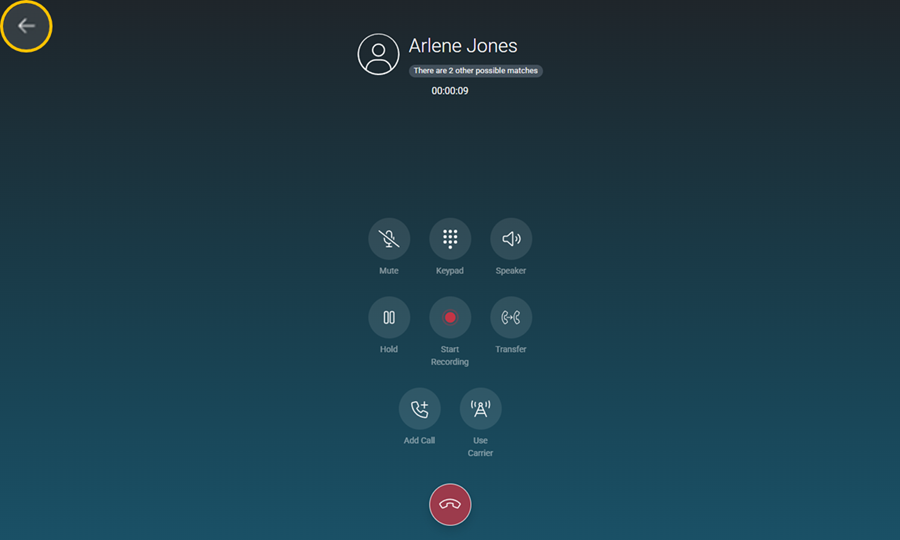
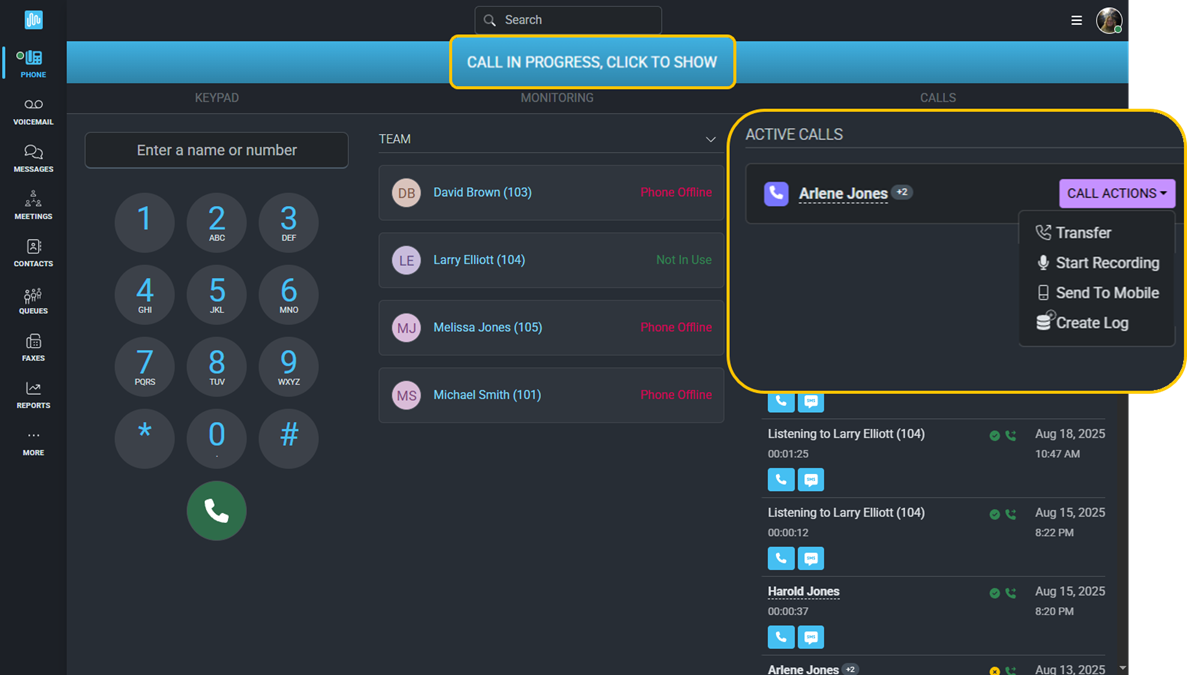
Calls can be transferred without needing to put the caller on hold. Just click Transfer to open the transfer screen.
Calls can be transferred to a number of locations:
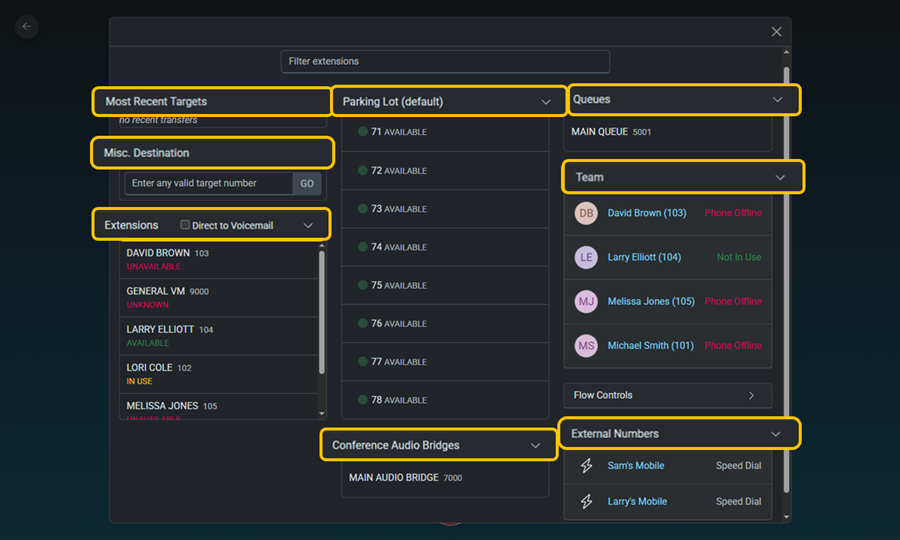
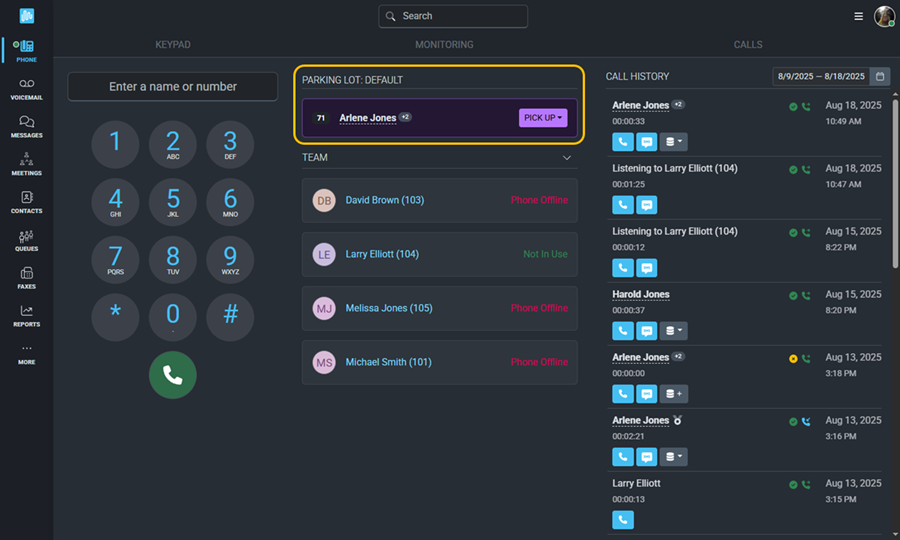
Calls that are sent to the Parking Lot can be picked up by anyone in the organization from any extension. For example, you can park a call and let a colleague know that there is a call parked for them, which they will then be able to pick up from any extension within the organization.
A second call can be added and conferenced together with another caller from the active call screen.
Click Add Call to place the first caller on hold while you return to the home screen and contact the second caller.
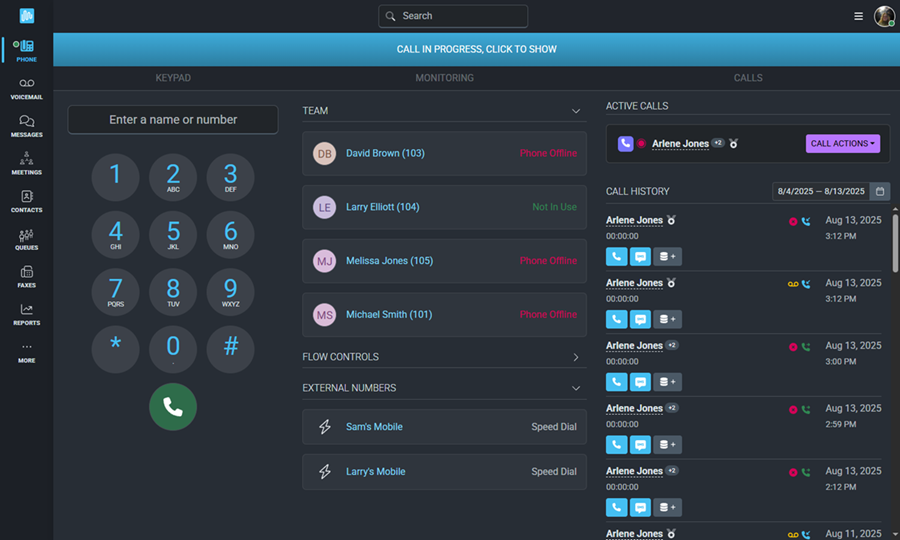
Enter the contact's name or phone number or select an extension or speed dial. Once the caller answers, you will see both the held call and the active call.
Click Conference,
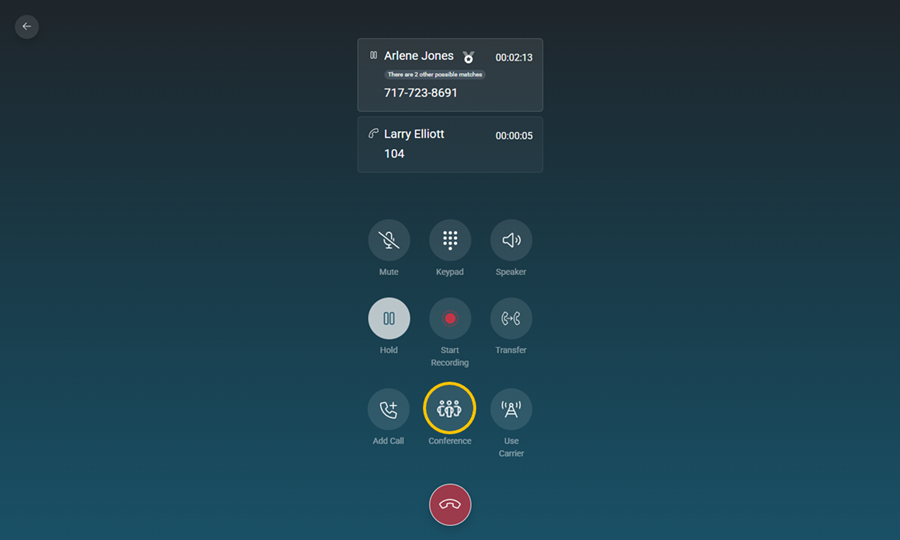
then select the call to conference.
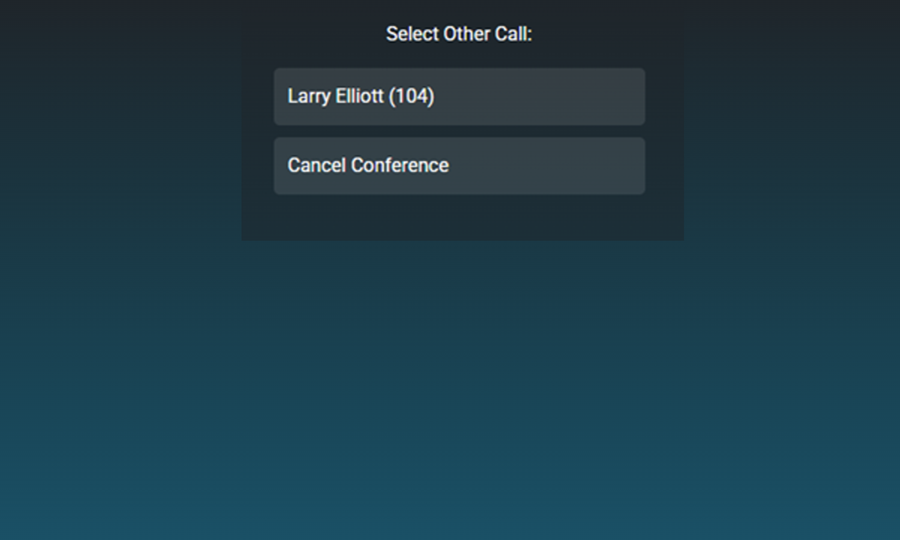
When the call is over, you can either Split the callers back into individual calls, or end the call.
Although multiple calls can be conferenced this way, we recommend using an Audio Meeting for more than 3 callers.