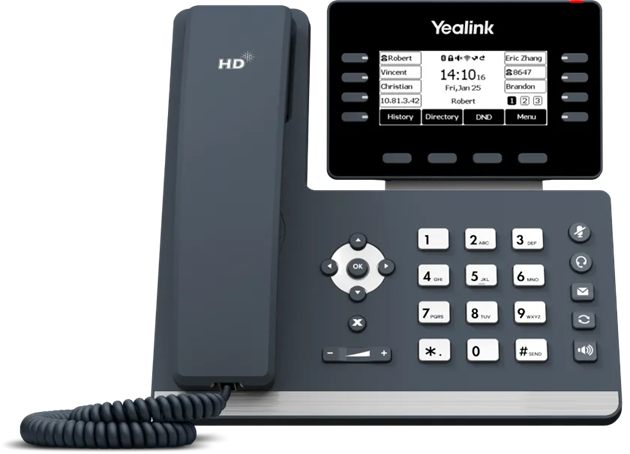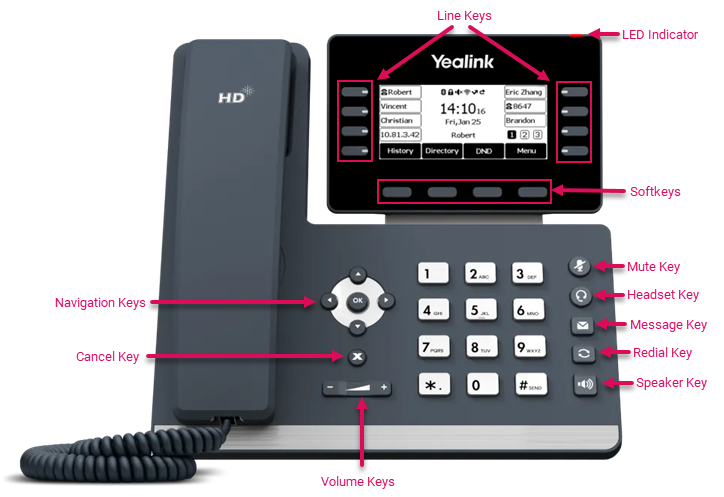
The Yealink T53W is an entry-level phone that is well suited for common workspaces. It provides an adjustable high-resolution display, utilizes Bluetooth technology to support wireless headset options, and allows for a variety of customizable buttons.
The video for the T54W will also apply to your T53W. Both phones are similar with just a few minor differences. Click here to access the User Guide video for the T54W.

If you're bringing your own phone to Intulse, a factory reset will clear out any settings from your previous provider. A factory reset is also helpful in situations where any other troubleshooting steps haven't resolved an issue with your phone. This will restore your phone's settings to the factory defaults and allow you to start from a clean slate.
To perform a factory reset, press and hold the OK key for 5-10 seconds until you see a confirmation message. Press OK and the reset will begin. If your phone is already provisioned with Intulse, it will automatically reconnect to Intulse's services once the factory reset is complete.
Use an ethernet cable to connect your phone to your network (router, firewall) or connect to a Wi-Fi network.
Wi-Fi settings can be accessed by pressing the Menu softkey and navigating to the Basic menu. Scroll down through the Basic Settings until Wi-Fi is highlighted and press OK. Scroll down this list until the Available Networks option is highlighted and press OK. Now complete the following steps.
To place an outgoing call, choose one of the following options:
Calls placed from your Intulse app when your Virtual Phone is disabled will begin from a connected physical device. When you enter the name or number in the app and click the call button, any enabled desk phones assigned to your extension will also ring. When you pick up the call on one of those devices, you will hear the outgoing ringtone because the system is in the process of calling the intended party.
When you are on a call, you can hold your current call and place a new call.
When you receive an incoming call, the phone will ring and the screen will display the details related to the incoming call.
To answer the incoming call, do one of the following:
Note: When pressing the Answer softkey, the call is answered in the speakerphone (hands-free) mode by default.
If Call Waiting is enabled on your phone AND your Intulse app, you can answer an incoming call even if you are currently on an active call. A call waiting tone will alert you of the new call, and the incoming caller ID details will be displayed on your phone.
Note: Call Waiting must be enabled to utilize this feature.
You can place an active call on hold and resume the call when you are ready. When you place a call on hold, the held party will hear the music or recording selected by your system administrator.
Placing an active call on hold is simple.
Press the Hold key during a call.
You can easily view and resume any calls placed on hold.
During a call, you can transfer the caller to another extension using one of the following methods:
Note: Many organizations use call parking instead of transfers because it's an easier way to move a call to other users.
A blind transfer sends the caller to another extension without any interaction between the person transferring the call and the extension receiving the transfer.
A blind transfer can also be completed by pressing a BLF key. This will immediately end the call with your extension and transfer it to the desired destination.
A semi-attended transfer places the caller on hold and allows you to hear a ringback tone before transferring the call. If the user at that extension isn't available, you can retrieve the caller from hold. An attended transfer puts the caller on hold so you can communicate with the intended recipient prior to the call being transferred.
Note: If you wish to move calls around while having the opportunity to speak with the destination before they receive the call, then Intulse recommends using call parking instead of attended transfers in most cases.
To transfer a call directly to a voicemail, enter an asterisk before the extension number. For example, to transfer a call to the voicemail for extension 107, perform a transfer to *107.
Call parking makes the process of moving calls to different extensions within your organization much easier. Calls are placed on hold by assigning them to a "parking space". Any user can retrieve a call from the parking lot by pressing the corresponding line key on any phone connected to your system.
For example, let's suppose that John answers many incoming calls during the day. John may need to send some of those calls to his manager, James. John can park a call in a space and call or message James to let him know that a caller is holding for him in Park 71. James can answer that call from any phone connected to their Intulse system. If James is unable to answer the call, John or anyone else in their organization can retrieve it. If no one picks it up, the call will eventually ring back to the person who parked it.
Parking a call in a parking lot is simple and can be accomplished in one of the following ways.
Parked calls can easily be retrieved from any phone connected to your Intulse phone system in one of the following ways.
There are a few different ways to accomplish multiway calling. We will cover how to merge a few calls together here, but Intulse offers an Audio Bridge solution, which is what we recommend for more than 3 callers.
Multiway Calling, or creating a phone call between 3 callers, can be accomplished by following these steps:
You can also invite a held call into a conference call with an active call. Let's assume you have two calls on your phone that you want to merge into one conference call.
Calls that have been merged into one conference call can also be split back into individual calls.
For more information please see the Conference Calling Guide.
The following will cover how to access the voicemail system from your phone. Intulse has a complete guide on how to use the voicemail system. For more information please see the Voicemail User Guide.
Accessing the voicemail for your extension is simple.
 ).
).Your phone may be configured so one of your programmable line keys is monitoring another voicemail box. It will turn red if that mailbox has new messages.