9. ENABLE TEXT MESSAGING
The process of transferring your number(s) to Intulse will take some time. There are two final onboarding steps once that porting process is complete.
**In order to fully utilize SMS texting, your Brand and Campaign must be 10DLC complaint. Once your brand has been approved, make sure you go back to the 10DLC page and create a campaign.
They will be submitted to the mobile carriers for approval, which will take up to several days.
How to Enable Messaging
After your numbers are ported, log into the Account Center and go to Phone Numbers › Manage.
Complete the following steps for any Intulse voice numbers that will be used to send or receive SMS or MMS texts.
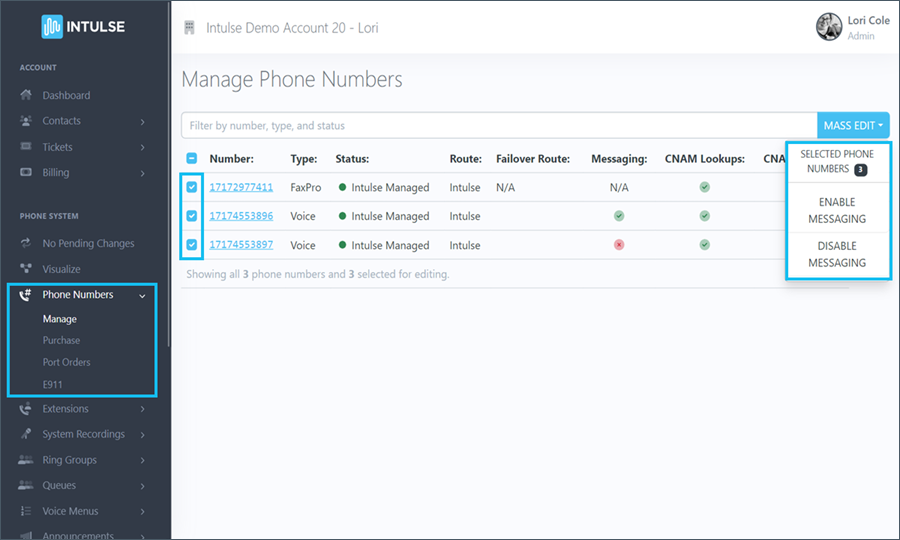
- Select the checkbox beside any phone numbers that should be text enabled.
- Click the Mass Edit button and select Enable Messaging from the drop-down list.
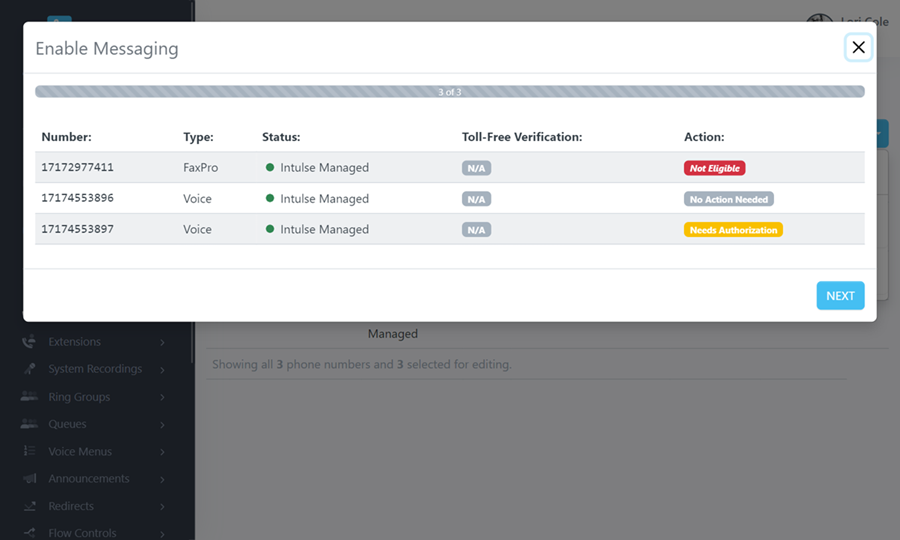
- An action notification message will inform you of the status of each number. Click the Next button.
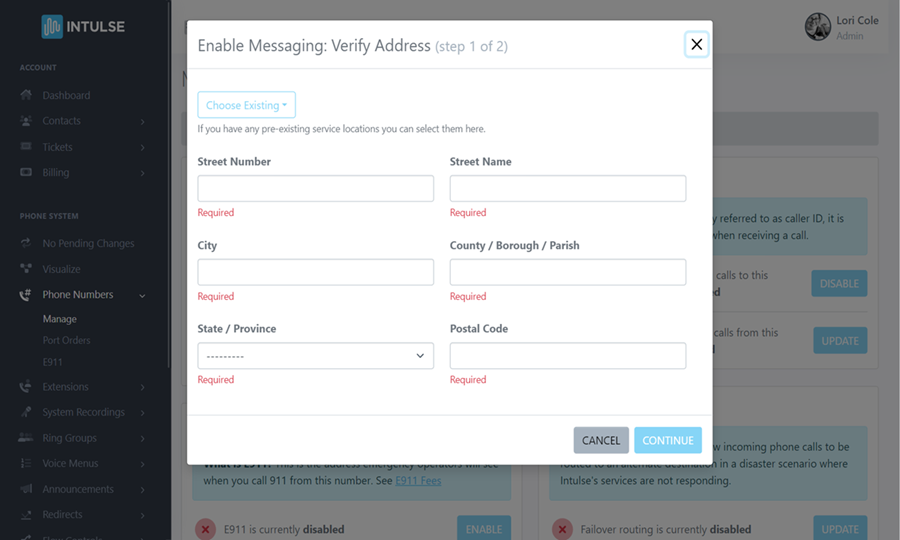
- Enter the required information to verify your business address. (If you have entered your service address on any previous screens, you can use the drop-down to select an existing address.)
- Make sure all information is correct and select the “CONTINUE” button.
- Carefully read the Letter of Authorization and type your name and title in the signature fields at the bottom of the screen.
- Once you click the button to “SUBMIT” the form, the amount of time it takes for services to be transferred can vary. Some carriers approve within moments, others take a few days.
ONCE YOUR NUMBERS HAVE BEEN APPROVED, YOUR TEXTING SERVICES WILL BE TRANSFERRED AWAY FROM YOUR PREVIOUS PROVIDER.
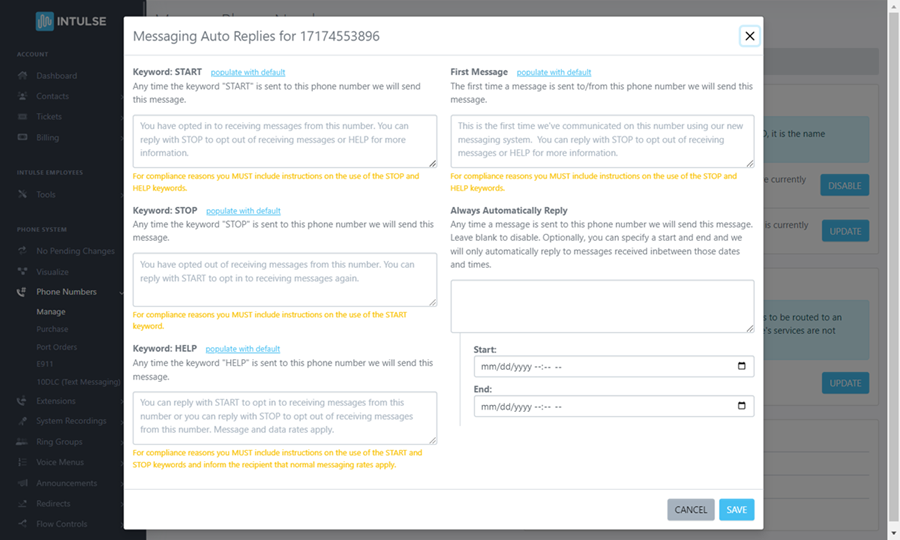
- All Intulse phone numbers that are used for business texting purposes must provide automated responses, allowing recipients of the text to opt in or out of the conversation. These responses are populated with a default message but can be customized by clicking the “Configure” button. Any customized replies must comply with the FCC rules about A2P text messages so be sure to follow the on-screen prompts when creating your messages.
- Once your numbers have ported to Intulse and your texting campaign has been approved, you will need to add any numbers you will use for texting to the campaign.
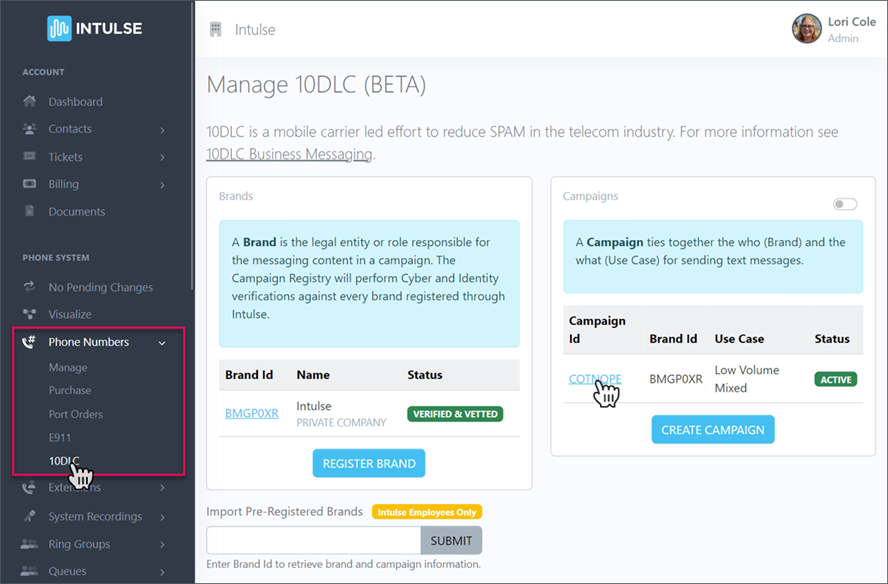
- Go to
Phone Numbers › 10DLC.
- Select the Campaign to add phone numbers.
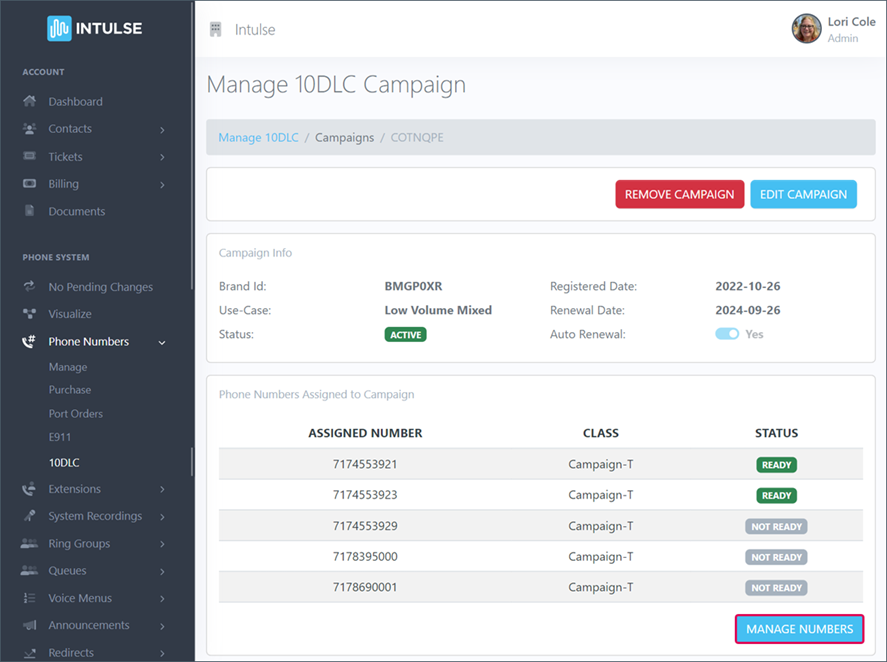
Under the section Phone Numbers Assigned to Campaign, click the blue button to Manage Numbers.
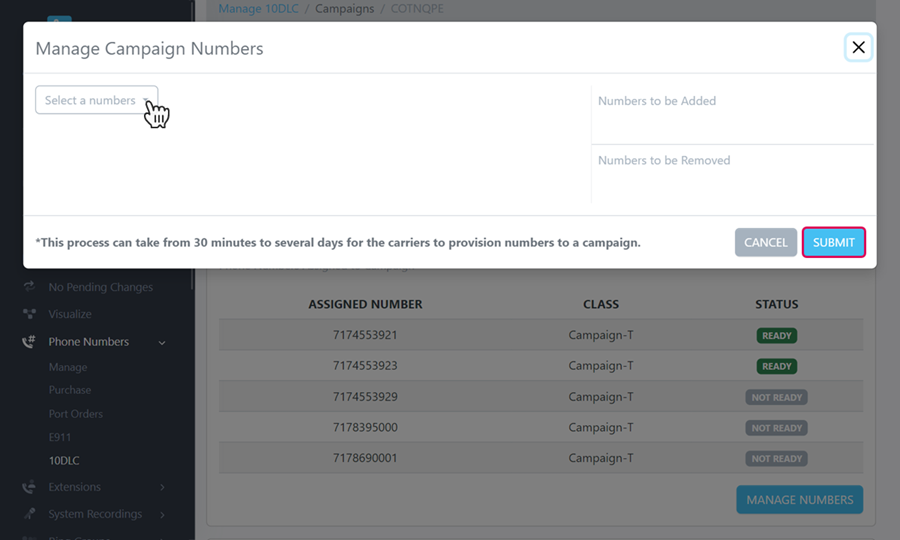
Use the drop-down and select any numbers that should be assigned to the campaign. Once they have all been added, click the blue Submit button.
If you followed the video for this step, you will need to scroll up and complete number 9 to add your numbers to your texting campaign. This is not included in the video.
Click the Next button to complete the final step of the onboarding process.


