10. SET UP E911 AND OUTBOUND CALLER ID (CNAM)
GREAT NEWS! You've made it to the final step in the process!
Similar to the last step, here you will enable some settings for each of your Intulse phone numbers. Setting up E911 on a phone number will assign a physical address to that phone number. This is the address that emergency responders will see should you ever need to dial 911 from an Intulse phone. We will also enable outbound caller ID, so devices receiving your calls will display the name of your organization instead of a phone number.
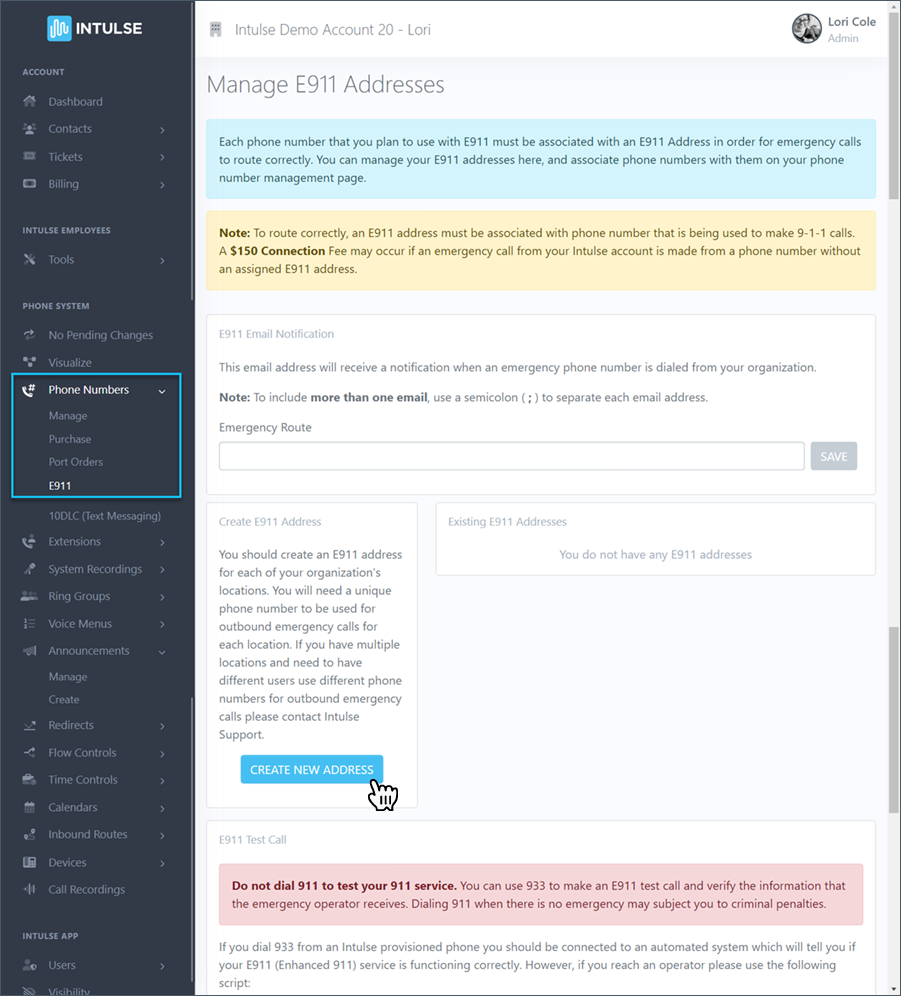
Create your E911 Address
Scroll down for a complete video walkthrough of this step.
- In the Account Center navigate to
Phone Numbers › E911.
- Click the "CREATE NEW ADDRESS" button.
- In the window that appears, enter your address details and click the "VALIDATE" button.
- Once verified click the "SAVE" button to add your address, which will be assigned to your phone numbers later in this process.
Enable E911 and CNAM
Return to Phone Numbers › Manage.
Complete the following steps for each of your Intulse voice numbers that will be used as outbound caller ID numbers.
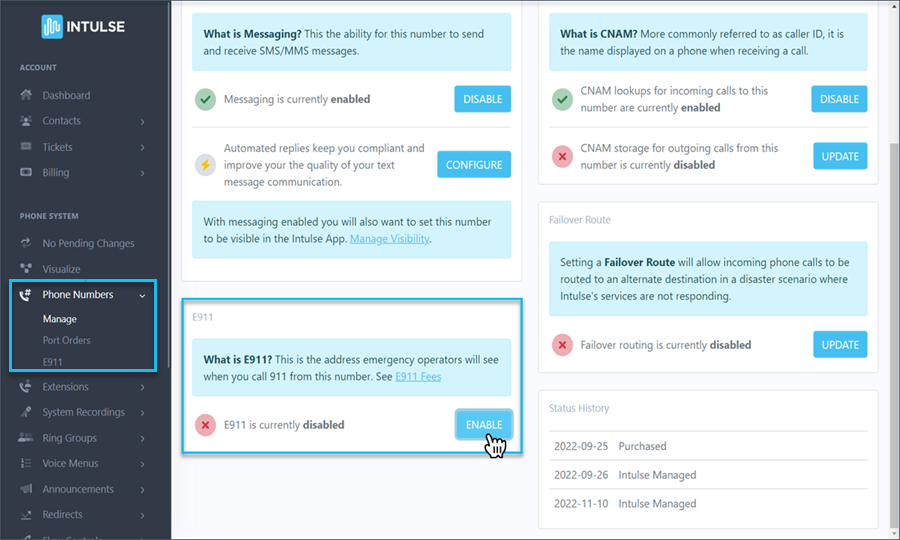
- Select the first phone number and find the E911 section of the screen.
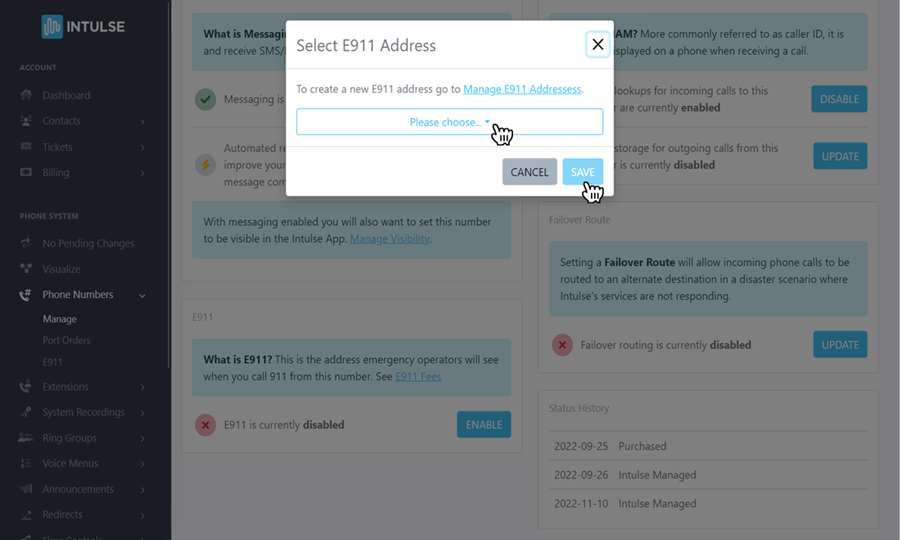
- Click the "ENABLE" button and choose one of the E911 addresses you created earlier and click "SAVE".
- Repeat this process for at least one outbound phone number at each of your organization’s locations.
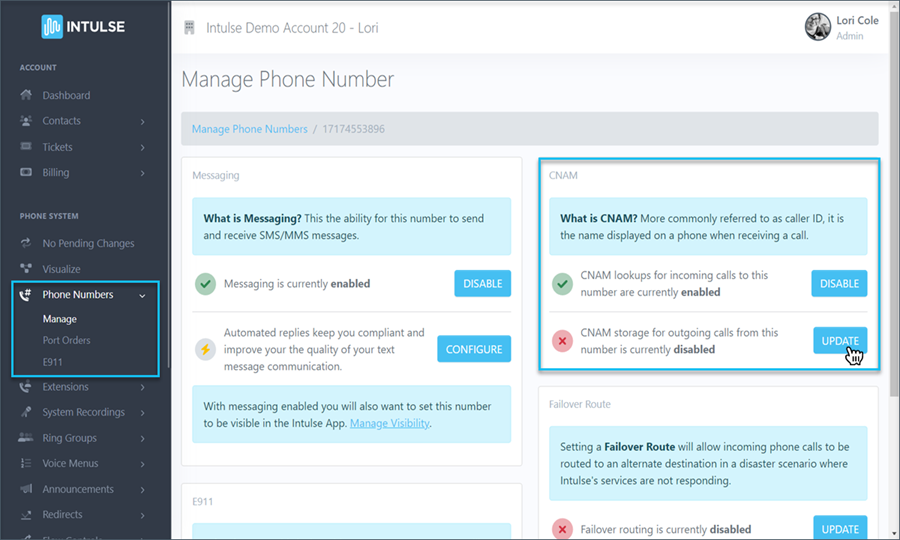
- Click the "ENABLE" button for CNAM lookups to display caller ID for incoming calls.
- Select "UPDATE" next to CNAM storage.
- On this screen, read the guidelines for what your outbound caller ID name can be, then type your new caller ID name and click the "CREATE" button.
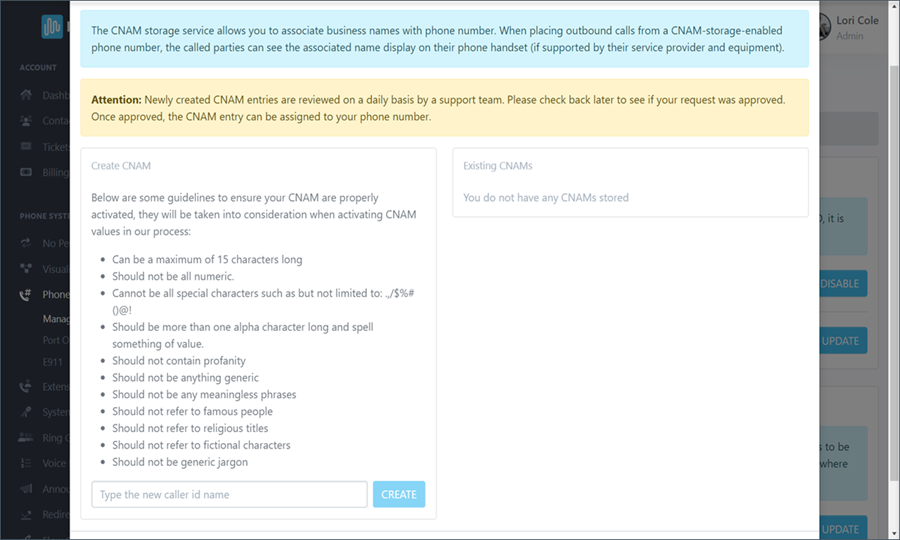
- Caller ID names must be manually approved and this process may take a few days. Once it has been approved, you will be able to return to this page and select it as the new Caller ID name to "USE" for your number.
- Repeat this process for each outbound voice number.
If you need help at any point in the future, we are always available to you! Visit our Support Site or open a support ticket in the Account Center.


