The Ubiquiti Edge Router Lite is a business-class router/firewall device that is meant to be placed at the edge of your local network. It has more processing power and throughput than other comparable devices for a fraction of the cost. We have found that these devices have great value for the money, and work exceptionally well for small office environments. This guide will walk you through the basic setup process for the Edge Router Lite, and will provide guidance on how to configure the device for Quality of Service, and optimize the device to handle VoIP traffic.
This guide is not meant to be a full technical paper that defines how to setup the Edge Router and your network, but rather a complementary guide for basic setup of the device.
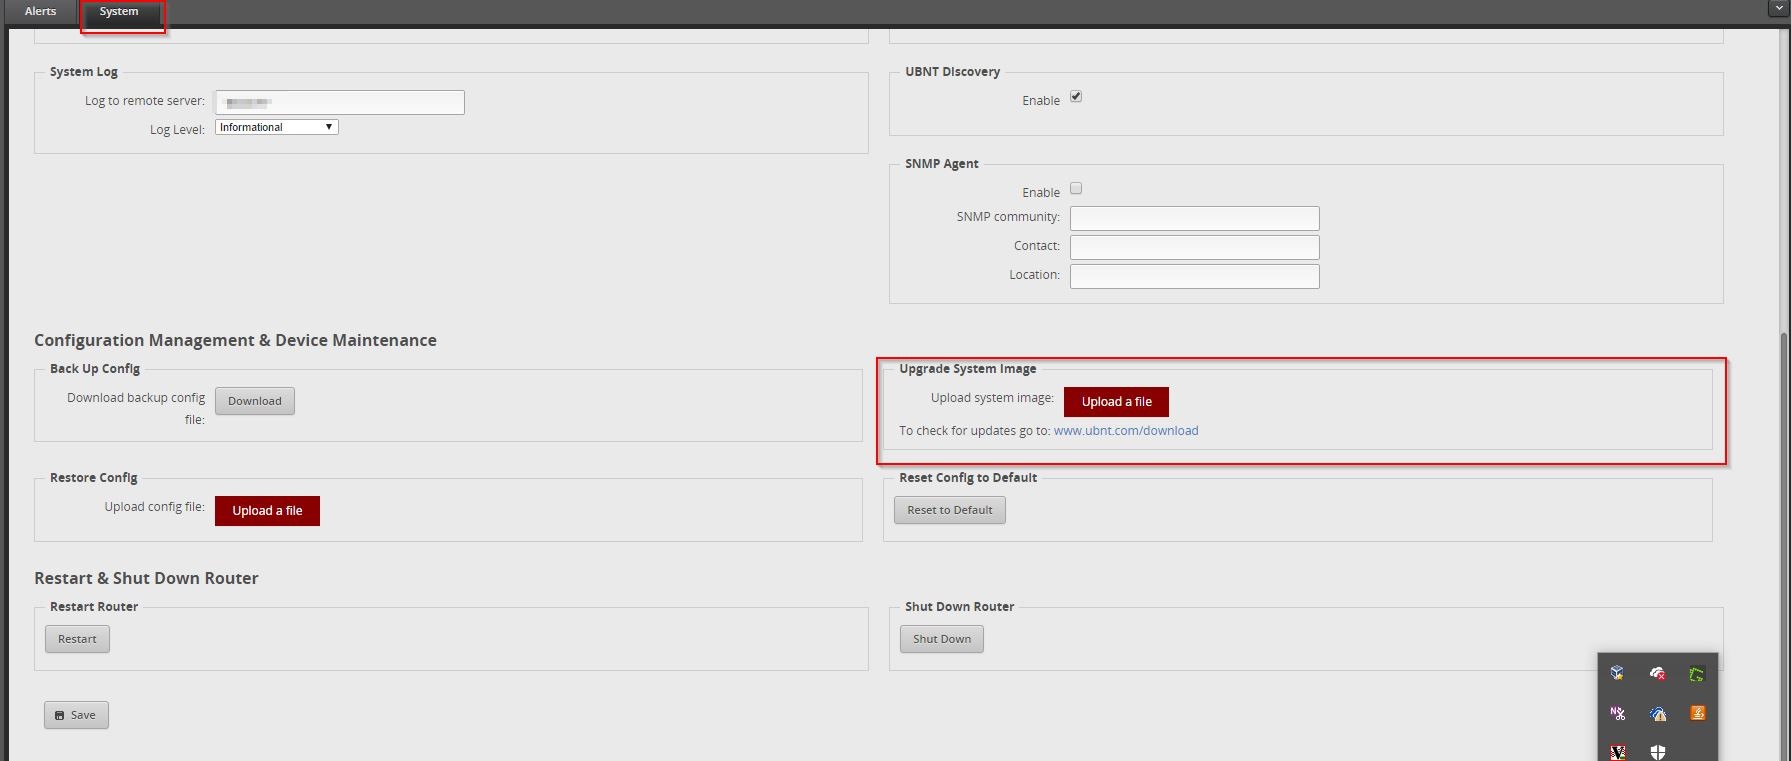
FIRST STEPS – FIRMWARE UPDATES
After logging into the device’s web interface, it is best to perform a firmware update to the device to ensure the device has the latest software updates and bug fixes. You can do this by clicking on the “System” tab at the bottom of the web page and then go to the “Upgrade System Image” section to upgrade the router to the latest firmware that you can download from www.ubnt.com/download. As of this writing, we recommend using Firmware version 1.9.0.
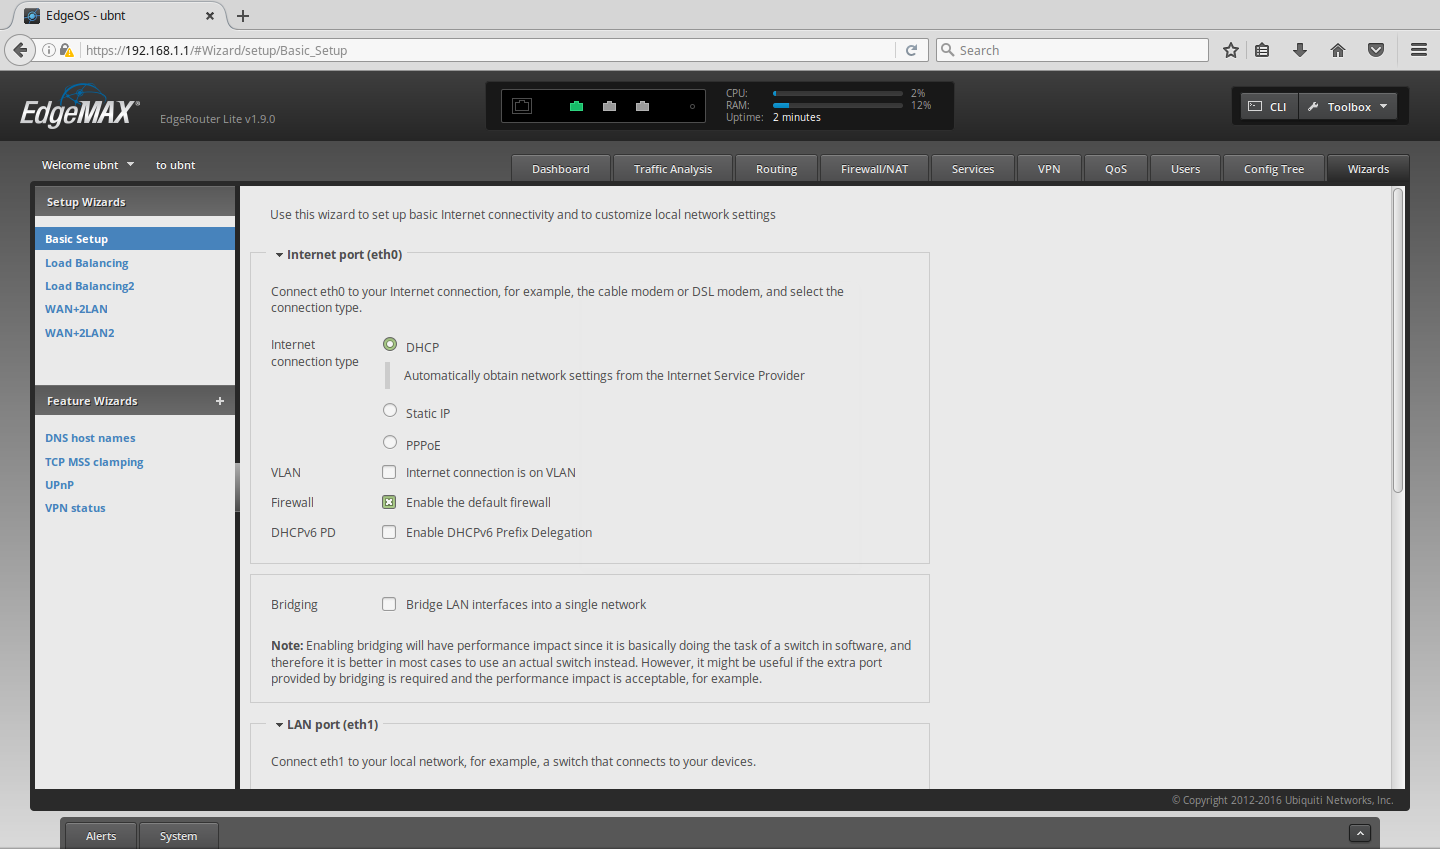
INITIAL SETUP
Use the web interface to navigate to the “Wizards” tab. In most basic networks, you can just choose the “Basic Setup” option on the left-hand menu. You can choose you WAN type based on the type of connection you have. (Static IP, DHCP, etc) Make sure the “Enable the default firewall” option is checked.
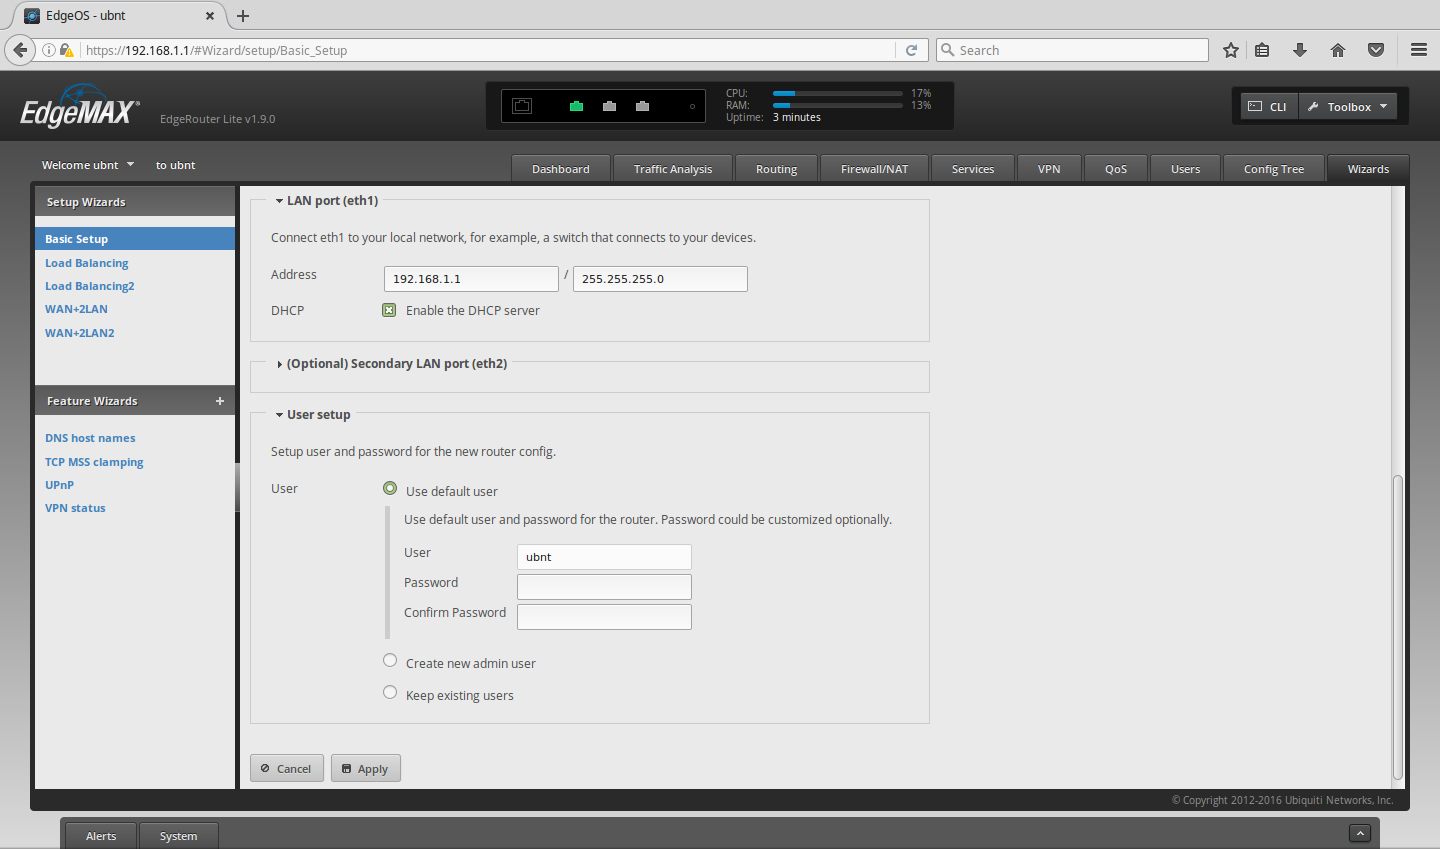
SETUP THE LAN
By default, the wizard assigns the IP address of 192.168.1.1 to the device. Checking the “Enable the DHCP server” checkbox enables the device to function as a full DHCP server. You can also change the username and password for this device in the “User setup” area below.
QUALITY OF SERVICE BASIC SETUP
For small business & office environments, basic Quality of Service (QoS) setup is easily achieved with the EdgeRouter by using the built in “Smart Queue” Setting up a Smart Queue is very easy and can be done in just a few steps.
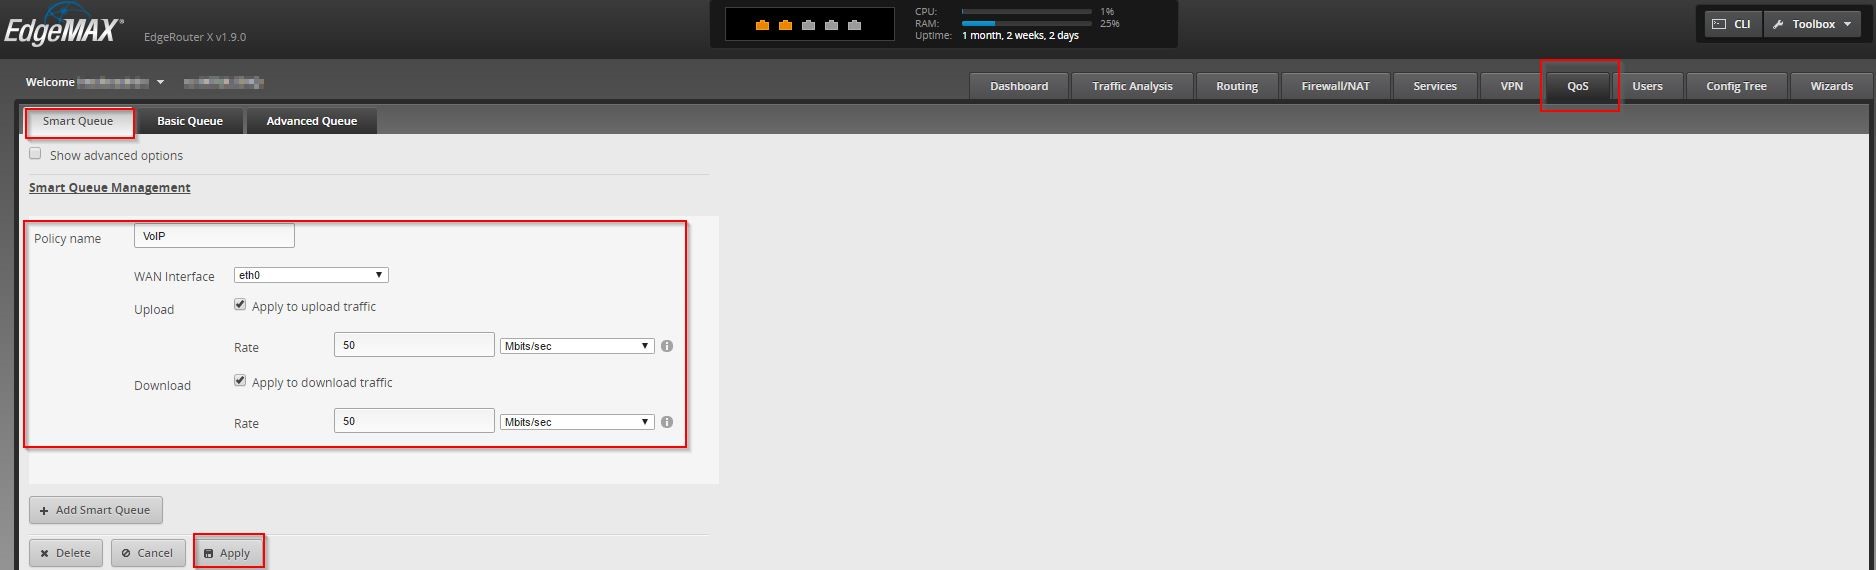
Click on the “QoS” tab at the top on the web interface.
Click on the “Smart Queue” Tab.
Give the policy a name. (VoIP for example)
Select the WAN interface. (Typically, eth0)
Set the Upload and Download rate. This is “line speed” of your internet service. If you pay your Internet Service Provider for 50 Mbit download & 50 Mbit upload, then that is what you would put in the rate boxes. Be sure to check the “Apply to upload traffic” boxes as well.
Press the “Apply” button.
SET DNS SERVERS
The device needs to have DNS servers to function properly. To set this up, do the following:
Click the “System” button at the lower left hand corner of the screen.
Scroll down to the “Name Server” section, located on the right side.
It is recommended to put in at least 2 to 3 name servers here. The first name server should be 127.0.0.1 (the loopback address of the router). The next 2 can be any trusted DNS server. In this example, we have used a well-known, public DNS server of 8.8.8.8. A third option could be 8.8.4.4.
DISABLING “SIP HELPERS” IN THE FIREWALL
To ensure the best quality possible with your VoIP service from Intulse, there is one command that should be set in the Command Line Interface (CLI). To do this, perform the following steps:
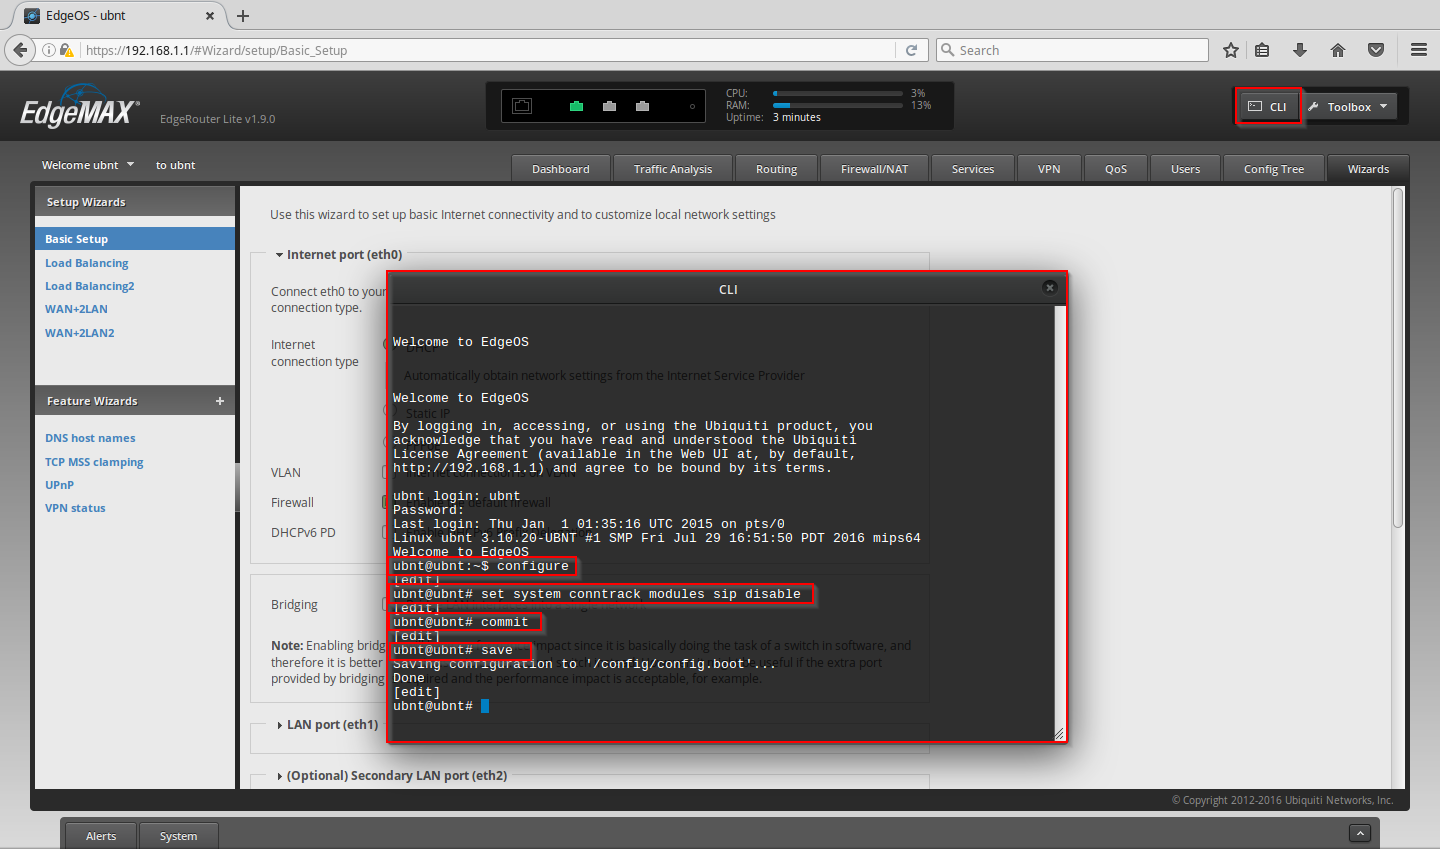
Click on the “CLI” button in the upper right hand corner of the web interface.
Login using the same username/password as you did to login to the web interface.
Type “configure”
Type “set system conntrack modules sip disable”
Type “commit”
Type “save”
After the configuration is saved, type “exit” twice to logout of the CLI interface.
CONCLUSION
After following these few steps, the EdgeRouter Lite will be setup for the basic needs of most small office environments, as well as be optimized for VoIP communications. To find more guides relating to the EdgeMax series or Routers/Firewalls from Ubiquiti, you can visit their support site here.
Rev. Jan 23, 2017